The Accounts page is automatically presented
when →  Configure KMail...
is selected. There are four tabs: Identities,
Receiving, Sending, and LDAP
server. (The Identities tab is illustrated in
the Configure KMail section above.)
Configure KMail...
is selected. There are four tabs: Identities,
Receiving, Sending, and LDAP
server. (The Identities tab is illustrated in
the Configure KMail section above.)
You can find a quick introduction to the Identities tab in the Getting Started section.
This page allows you to create one or more Identities, i.e., combinations of a name, an email address, and some other settings. For example, you can create one identity for business communication and another for personal use. If you have more than one email address, you can create one identity for each address. You will then be able to select a suitable identity whenever you compose a new message.
This dialog consists of a list of identities, plus buttons to manage them. After initial setup, the list will always show at least one identity, which is then the Default identity. To add a new identity to the identity list, click on the button.
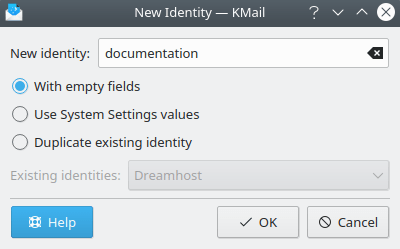
The New Identity Dialog
Enter a name for the new identity in the New Identity edit field. This name will be shown in the identity list.
You can choose how the new identity is initialized by checking one of three radio buttons.
- With empty fields
All fields of the new identity will be cleared, or preset with standard values.
- Use System Settings values
Uses the values from your default identity.
- Duplicate existing identity
Copies all fields from an existing identity. You may choose which identity to copy from by selecting the corresponding entry in the Existing identities drop down box.
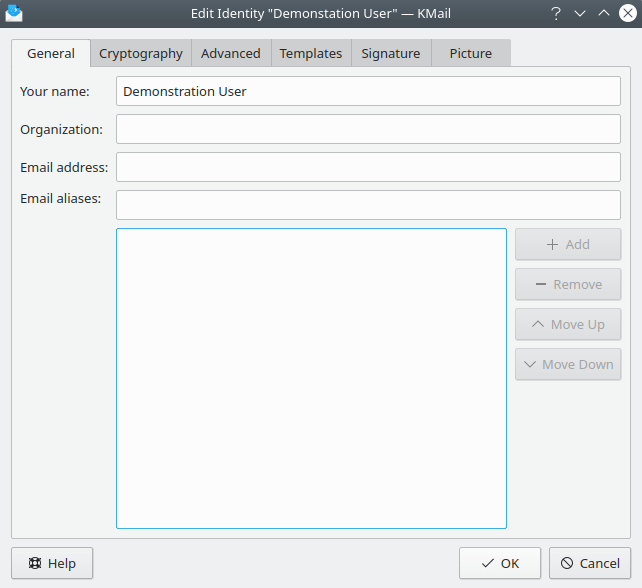
Identity General
The General tab allows you to specify some basic settings for the currently selected identity.
- Your name
Enter your full name here (sometimes also called display name). Although this field is not mandatory, you should enter your name here.
- Organization
Enter your organization here. This field is optional.
- Email address
Enter your email address here, i.e., something like
joe@example.com.Example 4.1. Email address
So if your address is
Joe User
<joe@example.com>
, you should enterJoe Userinto the Your name field andjoe@example.cominto the Email address field.- Email aliases
This field contains alias addresses that also belong to this identity (as opposed to representing a different identity). You may define multiple aliases. To add another alias. enter an email address in the Email aliases: field, then click the button
Example 4.2. Email aliases
Primary address: first.last@example.org
Aliases: first@example.org and last@example.org
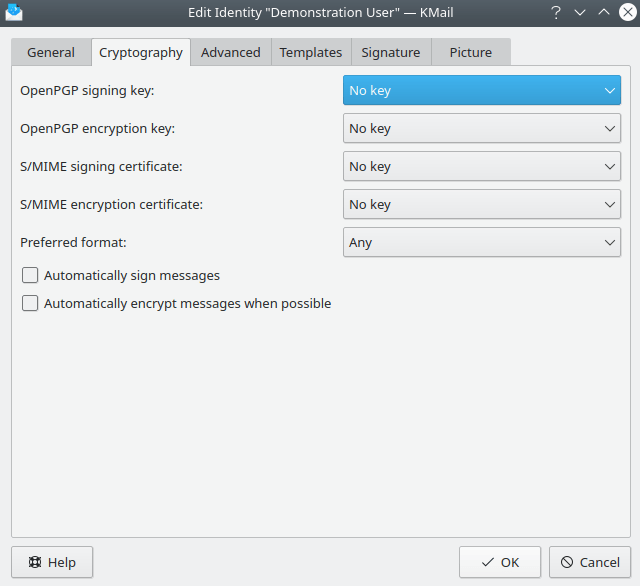
Identity Cryptography
The Cryptography tab allows you to specify the OpenPGP and/or S/MIME keys associated with this identity, and to choose the preferred (cryptographic) message format to use.
- OpenPGP signing key:
Here you may select an OpenPGP key for signing messages written with this identity in effect. For brevity, only the short key id of selected keys is shown. Hovering over the item will display more information in a tooltip. To select an existing key, use the drop down list. If you wish to create a new public / private key pair, select Generate a new key pair.
- OpenPGP encryption key:
Here you may select an OpenPGP key for encrypting messages when this identity and When encrypting emails, always also encrypt to the certificate of my own identity are in effect. This key is also used for the → function.
- S/MIME signing certificate:
Here you may select an x.509 certificate used to sign messages written with this identity in effect. KMail cannot generate x.509 certificates. They are issued by certificate authorities. If you have added such a certificate to your key ring, KMail can import and use it.
- S/MIME encryption certificate:
Here you may select an x.509 certificate for encrypting messages when this identity and When encrypting emails, always also encrypt to the certificate of my own identity are in effect.
- Preferred format:
Here you can choose the default cryptographic message format to use with this identity. You may either select one of the four formats supported by KMail, or leave the option at the recommended default setting of Any; this will choose the right format for each recipient you specify, and may create multiple copies of the message, some signed and/or encrypted with an x.509 certificate, and the others signed and/or encrypted with an OpenPGP key.
- Automatically sign messages:
Checking this box causes KMail to affix your digital signature to messages composed by this identity unless this option is manually overridden in the Composer window.
- Automatically encrypt messages:
Checking this box causes KMail to encrypt messages composed by this identity whenever such encryption is possible (unless overridden in the Composer window).
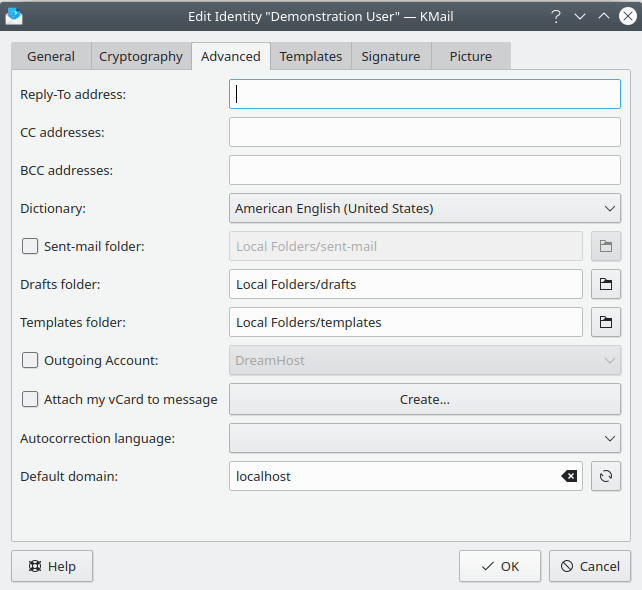
Identity Advanced
The Advanced tab allows you to specify some infrequently used settings for the identity you're currently editing.
- Reply-To address:
Enter the address to which replies to your messages should be sent. You need this field only if it is different from your normal address (specified using the Name and Email Address fields on the General tab), since replies default to the sender's address anyway.
This field is useful if you want replies to your mail to go somewhere else than your regular email address, e.g., if you are using this identity to send messages from an email address that cannot receive replies.
Note
Some mailing lists overwrite this header field with their post address (to ensure that replies go to the list instead of to individuals). So the reliability of this field is limited, and it should be used with caution.
- CC addresses:
Optionally enter one or more addresses, separated by commas, to which carbon copies of your messages should be sent. When you compose a message with this identity, the CC field will be filled with these addresses.
- BCC addresses:
Optionally enter addresses, separated by commas, to which blind copies of your messages should be sent. When you compose a message with this identity, the BCC field will be filled with these addresses. If you want to send a BCC to the same address for every identity you define, see the Headers tab of the Composer subset (create a custom BCC header).
- Dictionary:
Select the default dictionary for the current identity.
- Sent-mail folder:
Select the folder in which messages should be saved after sending them from this identity. IMAP users should consider changing this to an IMAP folder, so their sent-mail is stored on a server instead of being stored in a local folder. Then they can access sent messages from a different location.
Tip
You can exercise more fine-grained control over where to file sent messages by creating a corresponding message filter that is applied to outgoing messages.
- Drafts folder:
Select the folder in which drafts should be saved when using this identity. IMAP users should consider changing this to an IMAP folder, so their drafts are stored on a server instead of being stored in a local folder. That way they can easily continue to work on their drafts from a different location.
- Templates folder:
Select the folder in which templates should be saved when using this identity. Please see Compose from templates for more information about templates.
- Outgoing Account:
Specify an alternative SMTP / sendmail® / Microsoft® Exchange server to be used when sending messages from this identity.
Note
You need to configure outgoing mail servers first, before you can choose them from the list. You can do this on the Sending tab of the Accounts page.
- Attach my vCard to message
Choose this option if you want to attach a vCard file to each message sent from this identity. A short dialog will ensue.
- With empty fields
This option opens a dialog just like the KAddressBook Adding Contact Data dialog. Enter your name, email address, etc., then click OK to create a new vCard.
- From existing vCard
This option opens a browse directories dialog which allows you to to select a .vcf file. (Hint: Use KAddressBook to export a vCard file that can be used here.)
- Duplicate existing vCard
This option opens a drop down list of all the other identities already defined, so you may select the vCard associated with one of them.
- Autocorrection language:
Use the drop down list to select the language associated with the optional autocorrection tool when using this identity.
- Default domain:
This field is filled with the value from the
hostnamesfile (in /etc) by default. The Composer will append this domain name to any purely local email address you specify. This feature is primarily useful in a sendmail® environment.Example 4.3. Default domain
Default domain set to
kde.org; "To:" address set tofoo.Composer sends the message to foo@kde.org.
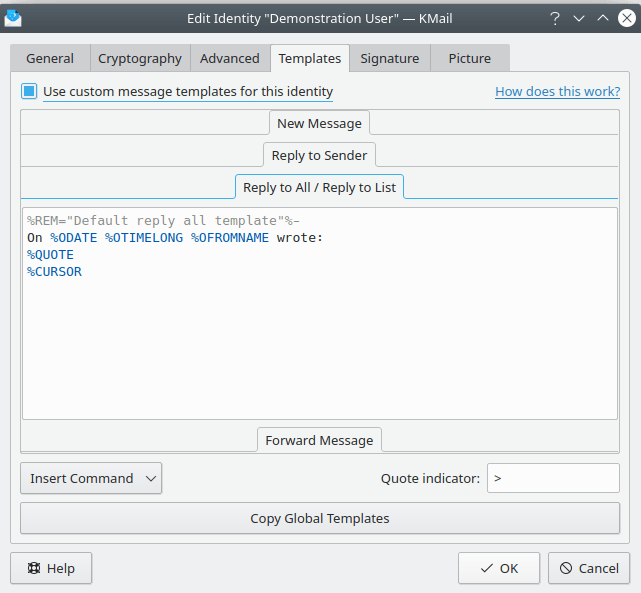
Identity Templates
Here you may create and manage custom templates for this identity to use when composing new
messages, replying to someone, or forwarding messages inline. The message templates support substitution
commands. You may simply type them in, or select them from the Insert Command  menu.
Three kinds of commands are provided.
menu.
Three kinds of commands are provided.
- Original Message > / Current Message >
These commands extract information from the message you're replying to, or forwarding, and insert that information into the composition window.
- Process with External Programs >
These commands will pipe the message to which you are responding through an external program, then insert the output into KMail's composition window.
- Miscellaneous >
These commands perform functions like choosing the dictionary the spell checker should use, or inserting the contents of a text file into the composition window.
The Quote indicator: field allows you to override the default quotation indicator character ">". The button will reset all the custom templates defined here to KMail's defaults. (You can achieve the same end result by unselecting the Use custom message templates for this identity check box at the top left of this dialog box.)
Templates specified here are identity-specific. They override global templates, but can be overridden by folder-specific templates if those are specified.
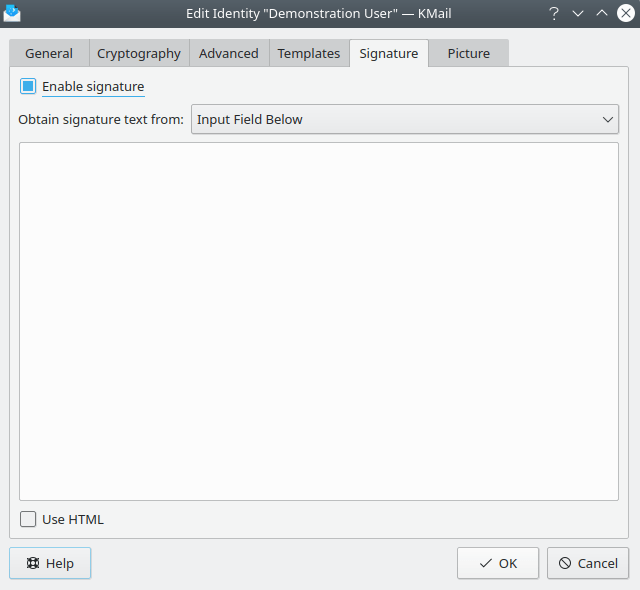
Identity Signature
This tab allows you to specify a signature (sometimes called “footer” or “disclaimer”) to be appended to each message sent from this identity.
Note
This type of signature has nothing to do with the (digital) signatures discussed in the Cryptography section. It is a bit confusing to call this a signature, but since the term is already used everywhere else, we keep this nomenclature. Just remember that these "signatures" and digital signatures are two completely different things.
Check the Enable signature option if you want KMail to append a signature when using this identity. To automatically append it to every new message you must also select Automatically insert signature option on the Composer configuration page.
KMail can obtain the signature text from various sources. The default is Input Field Below. Just enter your signature in the textbox. If you want to use rich text, select the Use HTML checkbox at the lower left. A formatting toolbar will then appear.
The traditional procedure in Unix is to read the text from a file called .signature in your home folder.
This file may be shared among several programs, so the same signature appears in every email program you use.
To do this, select File from the Obtain Signature text from: drop down menu.
If you want to edit the file, click the Edit File button.
KMail can also read the signature text from the output of a command. You can use programs such as fortune to create a randomly selected signature for each new message. Everything the program prints onto stdout is caught and used as the signature text. To read the text from the output of a command, select the Output of Command option. Enter the command (with full path) in the Specify command: edit field.
Note
On the Internet, signatures are by convention separated from the body of the message by a line containing only the three characters “-- ” (dash, dash, space). If the Prepend separator to signature option has been set in the Composer configuration, KMail will automatically prepend this line to the signature text (unless it is already present).
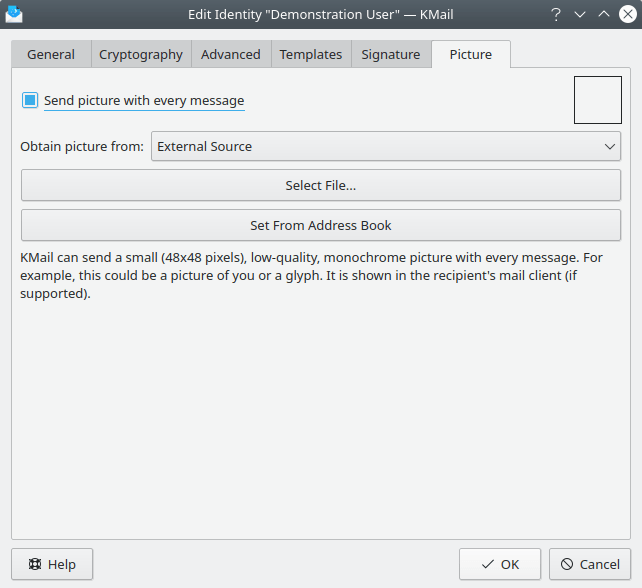
Identity Picture
KMail can send a small (48x48 pixels), low-quality, monochrome picture with every message. For example, this could be a picture of you, or a glyph. It is shown in the recipient's mail client (if supported).
- Send picture with every message
Check this box if you want KMail to add a so-called X-Face header to messages written with this identity. An X-Face is a small (48x48 pixels) black and white image that some mail clients are able to display.
- Obtain picture from:
This drop down list gives you two ways to select an image.
- External Source (the default)
Use this button to select an image file from which to create the picture. Use a high-contrast image that is square, or nearly square. A light background helps improve the result.
You may use this button to create a scaled-down version of the picture you have set in your own address book entry.
- Input Field Below
Use this option to enter an arbitrary X-Face string. Examples are available at https://ace.home.xs4all.nl/X-Faces/