Table of Contents
This is a short introduction to KMail and its usage so you can start working with it right away. For more in-depth information see the Using KMail section.
The first time you run KMail you will be greeted by the Account Wizard.
Note
If at any time you need to run the account wizard again, you can find it under → .
The wizard will lead you through the process of creating an email account. Your screens will vary depending on how much the wizard can determine on its own. Here is an outline of the screens you will encounter while using this wizard.
The first screen of the wizard is Provide personal data. It will prompt you for your basic account information: Full name:, E-mail address, and Password. By default, the Find provider settings on the Internet option is checked, so the wizard will attempt to retrieve the necessary information from the email server. Uncheck this option if you are an expert user and you want to set up an advanced configuration. Click the button when finished.
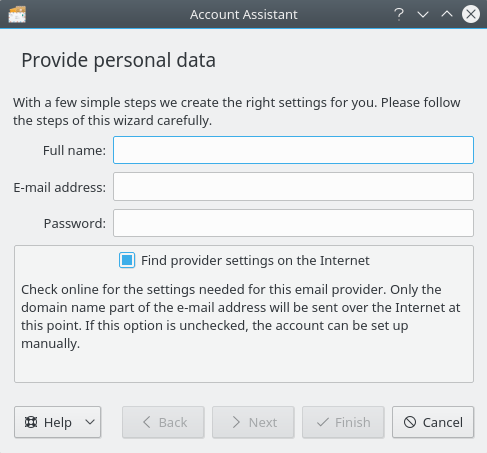
The "Provide personal data" dialog
Note
GMail accounts must use IMAP. If you have enabled 2-step verification for your GMail account, you will have to get a verification code from Google as part of the initial account setup process. You will not have to perform 2-factor verification after the KMail account has been created, because Google marks your IMAP link as fully trusted.
The next screen helps you set up encryption keys for your mail.
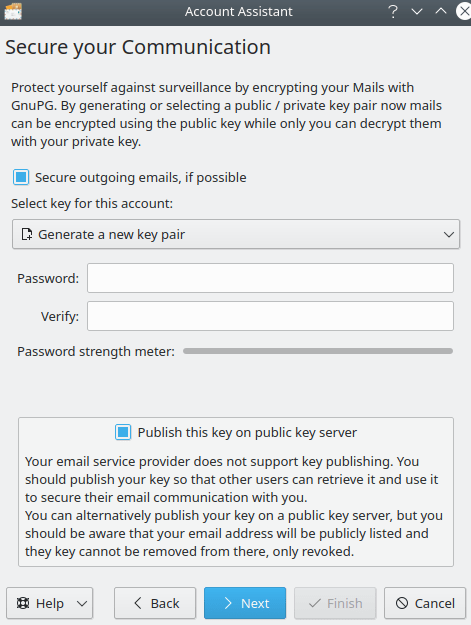
The encryption options dialog
If you want to secure your communications with GnuPG you can generate a new key and publish the key on a public key server, or you can import an existing key. If you decide to generate a new key pair, do not forget the password used to generate it. You will need that password every time you want to use the key.
When sending mail, KMail optionally looks for encryption keys for your recipients, and encrypts the message if a key can be found. KMail can also sign your mail cryptographically, so that each recipient can verify that your message has not been tampered with.
A Setup complete screen will appear if the wizard determined the account type successfully. Click to view the settings KMail has established. Click the button to set up the account, complete the wizard, and close the window.
The account type selection dialog
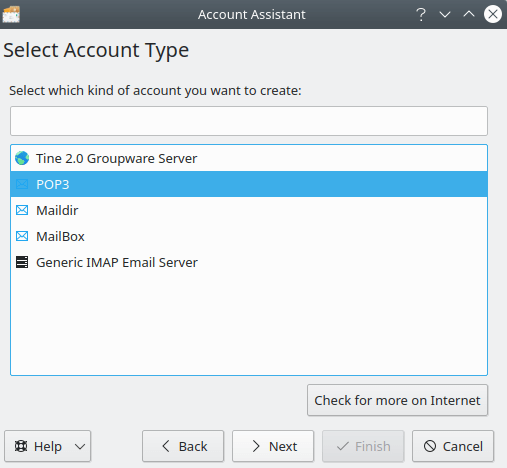
If the wizard cannot determine your account type, the Select Account Type screen will appear. Select your account type from the list (if you do not know, you will need to contact your email provider). If your account type is not listed, click the button. Once your account type has been selected, click the button, and you will be presented with the Personal Settings screen.
If the wizard could not locate your email server by searching the internet, the screen will appear.
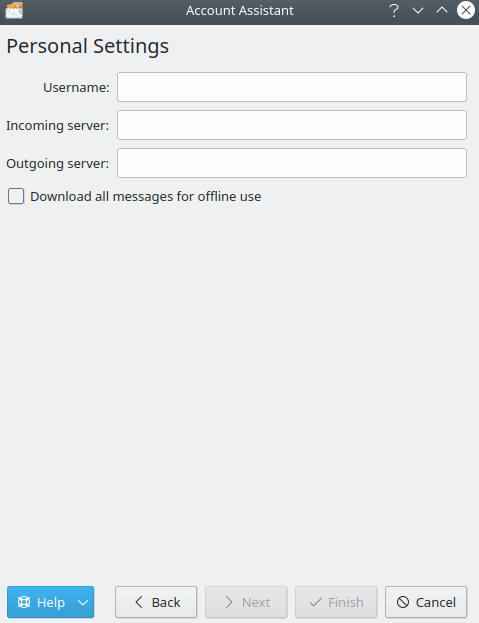
The "Personal Settings" dialog
Be certain to enter all this information correctly. Select Download all messages for offline use if you want your messages to be accessible when you do not have an Internet connection (IMAP only). Click the button when finished. The Setup complete screen will appear.
Your account has now been set up, and you can click the button to complete the wizard and close the window, or click the button to review the account settings.
If you wish to create an account manually, please continue reading this chapter. Otherwise, you may safely skip ahead to Testing your Setup.