
KMail's main configuration screen
The → window consists of six sections: Accounts, Appearance, Composer, Security, Misc, and Plugins.
To begin sending and receiving messages you will only have to change some settings on the Accounts page. Here is a brief synopsis of the steps you must take to set up a new mail account. For a more detailed description, please read the Configure KMail chapter.
To create a new identity, click the Add... button on the Identities tab associated with the Accounts page. A small pop-up window will appear.
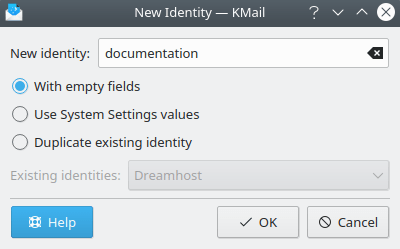
Adding a new identity
You have some options here. Give the new identity a name, and select one of the available choices ("With empty fields" or "Use System Settings values"). Then click OK. The identity configuration screen will appear.
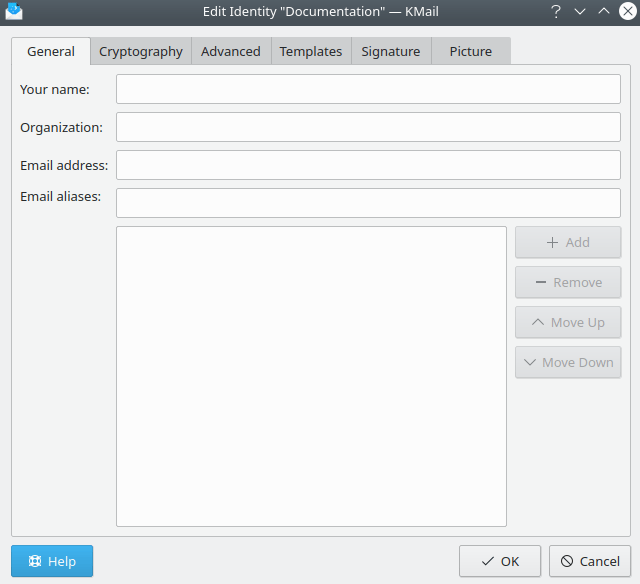
Configuring the new identity
The settings in the General tab are
fairly straightforward. Fill in the Your
name field with your full name (e.g., John
Doe) and the Organization field
(optional) with the appropriate information.
Next, fill in the Email address field with
your email address (e.g. john@example.net).
If you are using PGP or GnuPG you can set your OpenPGP keys and/or S/MIME certificates in the Cryptography tab.
The Advanced and Templates tabs can be used to tailor the way outgoing messages from this identity will be formatted and processed. See Configure KMail for more detailed instructions.
Optionally, go to the Signature tab and enter your signature. This is a short bit of verbiage that will be automatically appended to all your messages. It has nothing to do with digital signatures. You may also wish to insert a small personal avatar in outgoing message headers via the Picture tab.
The Accounts page also contains the settings that tell KMail how to send and receive your email messages. Many of these settings can vary greatly depending on the way your system is set up, and on the kind of network in which your mail server is located. If you do not know what setting to choose or what to put in a field, consult your ISP (Internet Service Provider) or system administrator.
Here's one way to create an outgoing mail account.
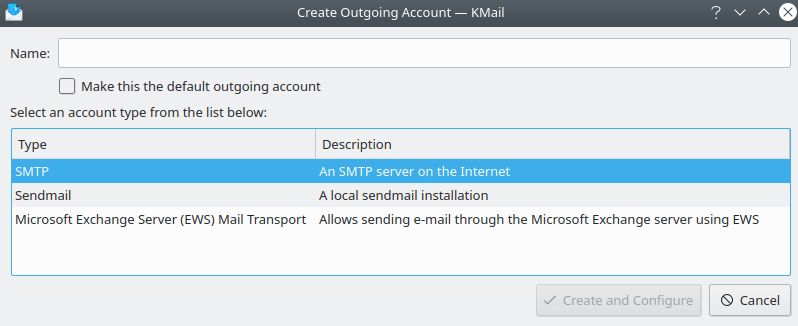
Choosing an outgoing email account type
When you click the button on the Sending tab, this screen will appear. If your computer is connected directly to the internet you will most likely want to choose SMTP. If you need to use sendmail® or Microsoft® EWS, please consult the Configuration chapter. Whichever type of outgoing account you select, check the box labeled "Make this the default outgoing account". (You can easily change this later if you have more than one email account.)
When you select the SMTP option and click the button, the following configuration screen will appear.
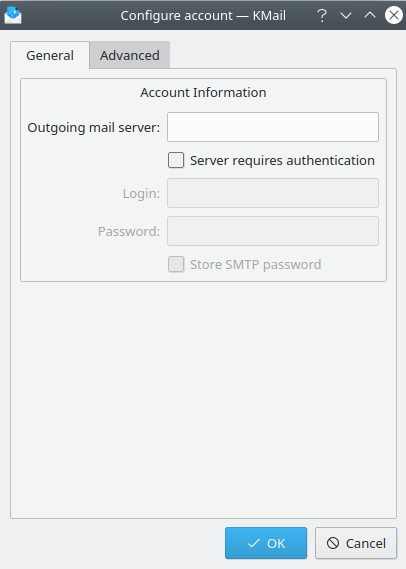
Configuring an SMTP account
At a minimum, you must supply an email server URI. If your email service requires authentication before sending messages, check the "Server requires authentication" box and supply your email address and password. If you want KMail to remember your password, check the "Store SMTP password" box. If you have not yet created a wallet, you will be asked to provide a password.
Verify that the connection to the SMTP server is working by choosing the Advanced tab and clicking the button. KMail will query your SMTP server for the correct settings (encryption, port number, and authentication method). After the proper settings have been detected, the outgoing account is ready to use. (Please refer to Configuration if the SMTP connection requires additional fine tuning.)
By default the Local Folders (inbox, outbox, sent-mail, trash, drafts, and templates) in the primary KMail folder are predefined on this tab. Using the drop down box you can set the Retrieval Options for these folders. (Note that KMail uses the Maildir format to store messages on your hard disk: each message is stored as a separate file. The exact location of the primary KMail directory depends on the Linux® distribution you have installed, but it is probably in ~/.local/share/ somewhere.)
To set up an account so you can receive mail, press the button on the Receiving tab. Choose "Custom Account..." from the drop down list. You will then be prompted for the account type. Most users will select POP3 E-Mail Server or IMAP E-Mail Server. If you want to use a local mailbox file (Mbox), please see the FAQ about file locking.
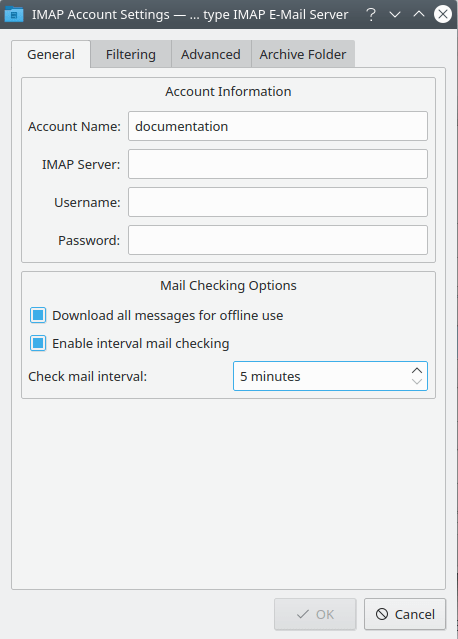
Configuring an IMAP account
If you chose POP3 or IMAP, the account settings window will appear. First, fill in the Account Name field to name your account. You can choose any name you like. Username, Password, and Incoming mail server (or IMAP Server) should be filled in with the appropriate information from your ISP or system administrator. If you want KMail to check for new messages automatically, check the Enable interval mail checking box and set the time interval you desire.
Next, click on the Advanced tab and then the button. KMail will query your incoming message server to determine the correct settings for this account (encryption, port number, and authentication method).
If you check Automatically compact folders on the Advanced configuration tab, KMail removes the messages you deleted from the server as soon as you leave that folder. Otherwise, the messages are only marked as deleted and it is up to you to compact the folders manually.
Select Leave fetched messages on the server on the Advanced configuration tab if you want to leave your messages on the server after you have downloaded them. There are seven ways to specify how long old messages will be kept after being downloaded: indefinitely (leave all options unselected), or number of days / number of messages / maximum size of server side inbox (choose one, two, or all three). If this box is not checked, all messages will be immediately deleted from the remote server after downloading is complete.
On the Advanced tab you can also select Use pipelining for faster mail download if this is supported by your server. Test this to make sure it works safely.
The inbox is the default folder for incoming messages. If you want to change that for some reason, you can do so with Destination folder. But what you probably want is a filter.
With Pre-command you can specify a program that KMail should execute before fetching mail. Please specify the full path (do not use “~”) and note that KMail will not continue until the program returns.
On the Receiving tab, under Retrieval Options, select Include in Manual Mail Check if you want to check this account whenever you invoke → . If you do not select this option you can still check for new messages on this account with → .
KMail supports encryption via SSL/TLS and STARTTLS (SSL/TLS should be preferred if it is available).
KMail supports nine authentication methods:
Clear text,
PLAIN,
LOGIN,
CRAM-MD5 (recommended if DIGEST-MD5 is not available),
DIGEST-MD5 (recommended),
NTLM,
GSSAPINTLM,
APOP (aka Anonymous), and
Gmail.
DIGEST-MD5, CRAM-MD5 and APOP are secure on their own. The other options are only secure when used together with SSL or TLS. You should only use Clear text if your server does not support any of the other authentication methods. Anonymous is supported on IMAP, but APOP is not. Gmail authentication is only available for IMAP accounts using Google's GMail service.
Use the button on the Advanced tab to automatically select the most secure settings supported by your server.
You are now ready to receive mail. For IMAP, just open your folders in the folder tree in KMail's main window. KMail then connects to your server and displays the messages it finds. For POP3 use → .
First, you should send yourself a message to test your
configuration. To send a message, either hit Ctrl+N, select the
 New button, or select
the → menu item. The
composer window will appear. Fill in the
To: field with your email address and type
something in the Subject field. Send the message by
selecting → .
To check your email, select → . In the lower right corner of the main window, a progress bar will indicate how many messages are being downloaded. If you receive the message you just sent, then congratulations! If, however, you receive any error messages while testing your setup, make sure that your network connection is working and recheck your settings at → .
