You can add bookmarks to your favorite shares from within the network neighborhood browser, the shares view and the Plasmoid. In the main window, this is done by selecting one or more shares and clicking the action. In the Plasmoid, you click the respective bookmark action next to the item's name. The Bookmark Shares dialog will pop up, listing all shares that are to be newly bookmarked.

To add a label or assign a category, double-click a bookmark. The input widget will open and you can edit the corresponding entries.

Defining categories may help you organize the bookmarks. In the bookmark menu, all bookmarks belonging to the same category are arranged in a respective submenu.
The label can be any text describing the share. In case you define a label, it will be displayed in the bookmarks menu instead of the location by default. If you want to change this behavior, you can do so in the configuration dialog.
In the main window, the bookmarks can be accessed and managed through the Bookmarks menu.
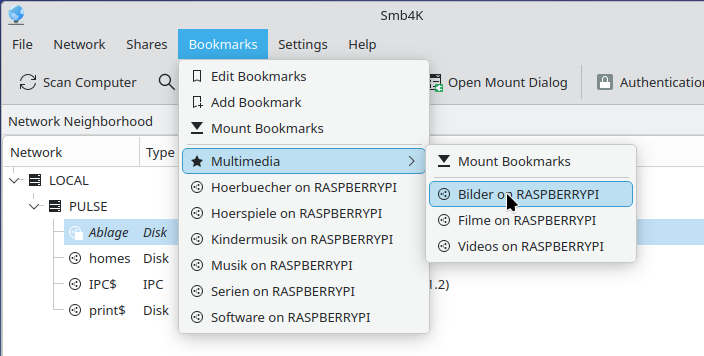
There are two static items in the menu:
Opens the bookmark editor. This entry is disabled if there are no bookmarks.
- (Ctrl+B)
Adds bookmarks to the selected shares. At least one share must be selected to enable this entry.
If there are bookmarks present that are not assigned to a category, and are, thus, shown directly at the top level of the menu, a third item is present:
Mount all top level bookmarks at once. This entry is disabled if all bookmarked shares are already mounted.
The following entries are category submenus and bookmarks that do not belong to any category. The entries are listed alphabetically and the bookmarks may appear either with their location or a descriptive label. If you click a bookmark, the respective share will be mounted. In case a bookmarked share is already mounted, the entry is disabled.
The category submenus contain the assigned bookmarks as well as a menu item. It can be used to mount all bookmarks in that category at once.
In the system tray widget, there is a similar Bookmarks submenu which, however, does not come with the Add Bookmark entry.
The Plasmoid provides a Bookmarks tab where all bookmarks are arranged in a similar manner as in the bookmark menu. For further details read this section.
The bookmarks may be edited or removed via the bookmark editor or the Bookmarks page in the configuration dialog. The bookmark editor can be opened by clicking the entry in the Bookmarks menu or the action in the Bookmarks tab of the Plasmoid.

In the tree view, the bookmarks are arranged according to the categories they belong to. Bookmarks without a category are located at the top level. To rearrange bookmarks, the tree view offers drag and drop capabilities, so you can move bookmarks around with the mouse.
If you want to edit a bookmark, you can do so by either double-clicking or selecting it and pressing the button. The input widget will then be shown. Here you can edit the label, category name, login, workgroup or domain name and the IP address.

In most cases, you do not need to touch the IP address and the login, because Smb4K stores the correct values at the time you bookmark the share. However, if the server got a different IP address (e.g. because DHCP is used on your local network), or your login changed, these entries should be adjusted. You also should adjust the workgroup or domain name, if its name was discovered by DNS-SD (and is most likely called LOCAL). With the label you can give each bookmark a custom description. It will be used for display instead of the location, but this can be changed in the configuration dialog. Finally,the category entry helps you to organize your bookmarks. For instance, if you use your notebook at home and also at work, and you do not want to use profiles, it might be a good idea to create two categories, "Home" and "Work", and categorize the bookmarks accordingly.
With the button, you can add a category. The button removes the selected bookmark and the button clears the whole list of bookmarks. As long as you have not saved the changes by clicking the button, you can reset all your changes with the button.