Table of Contents
Organizing your music makes it easier to find what you want. Amarok offers you several tools to assist.
First, organize your collection of music, both local and remote:
The Cover Manager organizes your album covers, the Tag Editor helps Amarok categorize your tracks, and transcoding allows you to transfer tracks to your devices in encoding they can play.
Amarok organizes your music in the Collection.
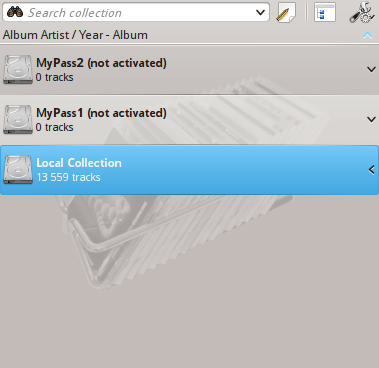
Every time Amarok is displaying a collection the information about tracks and albums needs to come from a source.
The source can be an portable device, an Internet service or a database.
For tracks that are in Local Collection folders Amarok is using a database to have fast access to the required meta-information.
At first this information needs to be loaded into the database which is usually done by scanning the Local Collection directories for audio files.
This process is called collection scanning.
It is useful to understand the scanning process in order to work better with Amarok.
The so-called incremental scan will check the collection directories for updates.
This is done every minute if Watch folders for changes is enabled (on by default) but can also be triggered manually by selecting Update Collection from the menu.
The incremental scan will just check the modification date of every folder in the collection against the last known modification time.
This has a couple of implications:
You can trigger a rescan of one directory by modifying its time (such as using
touch /path/to/directoryin the console).If files inside a directory are changed the scanner will not notice, because changing a file updates its modification time but not the time of the parent folder. On the other hand most programs that modify the files save them atomically by using a temporary file which is then renamed. Such procedure does update directory modification time and thus triggers directory rescan.
If the collection folders are on a very slow partition the process of checking all the modification times can take some time. Usually this information is cached by the operating system but with large collections that might not be possible. In such a case the scanner might appear to scan continuously. With collections above thousands of directories or when collections are stored on a network drive or an NTFS partition it is recommended to switch off the Watch folders for change option.
If you have problems with deleted tracks still appearing in the collection, or you want to update album covers (which are not updated by a mere Update collection) then you can use the Full rescan option in the settings dialog.
Full rescan will not care about modification dates. It will not delete statistics of existing files; it will, however, delete statistics of tracks that disappeared from the currently mounted collection folders. Because of that it is adviseable to perform the Full rescan only with all Local Collection folders mounted if you move the tracks between mounts. Full rescan also updates play count if the one stored in file tags is greater, rating if the song is unrated and file tags mention rating and score (under the same circumstances).
The progress bar will show the progress of the scanning.
Up to 50% the scanner will scan the file system and just buffer the result.
Times above 50% indicate that the scanner is committing the results to the database.
Usually the second step is much faster than the first so don't be surprised if the progress bar seems to jump.
Up to 50% aborting the scan is possible. After 50%, the committing of the files cannot be stopped.
The scanning time depends on your disk speed and other factors.
Usually the first scan is a lot slower than subsequent scans where the files are cached by the operating system.
A scan of 10000 files should take around three minutes on a modern computer. 50000 files should be around 13 minutes. Of course with an SSD (solid state drive) this will be much faster.
With the default settings Amarok is storing all the collection information in a directory called ~.kde/share/apps/amarok/mysqle/ . It can be a good idea to make a backup of this directory from time to time, especially when you didn't enable the writing back of statistics information.
Amarok is tracking files by an id that is either stored in the audio track or computed using file metadata, tag metadata and first few kilobytes of the file.
This id helps Amarok to identify tracks that are moved to other locations so that statistics information (rating, score, playcount, first & last played) are not lost.
Currently Amarok will not import tracks with duplicate unique ids.
This leads to the surprising behavior that copied tracks still appear only once in Amarok.
In some circumstances even different tracks can end up with the same unique id. Such a problem can be seen by the debug output (start Amarok with the --debug option in a console) while scanning.
The scanner can only read single tracks but Amarok will display those sorted by album and compilation (an album without one specific artist). Amarok can't rely on the directory in which the files are located, since directory organizational schemes vary so widely.
The scanner is therefore doing the following:
Tracks without an album artist or an artist (or a composer in case of a classical track) are placed in a compilation.
Tracks that have the compilation flag set or an album artist other than “various artists” will be placed in an album.
Tracks that have the compilation flag set to 0 are placed in a compilation.
Albums called “Best Of”, “Anthology”, “Hit collection”, “Greatest Hits”, “All Time Greatest Hits” and “Live” are always regarded as an album.
If we end up having tracks with several different artists left over they are placed inside a compilation, or else we make one album out of them.
This process is quite complicated. However usually the outputs of the scanner can help in figuring out why the tracks are sorted as they are.
In such a case try executing (on a command line) amarokcollectionscanner -r
~/your/music/directory
Look for “compilation” tags and tracks with different “artist” and “albumartist” tags.
You can remove the compilation tag from mp3 files with the following command: id3v2 -r TCMP
your filename here
Search Collection lets you specify complex filters to search for specific tracks in your collection. Use the edit box in the Media Sources pane or click the ![]() button right next to the edit box. Alternatively you can simply press Ctrl+F to activate the search bar.
button right next to the edit box. Alternatively you can simply press Ctrl+F to activate the search bar.
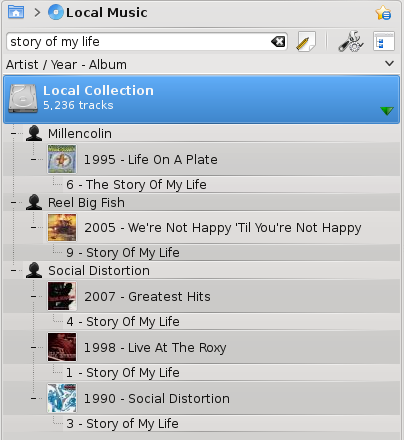
When you type in the input field, Amarok will search for the text in all available tags such as artist, album and title. Your view of the collection will update automatically to display only the matches of the search.
Pressing Enter after searching will populate your playlist with all of the found search items and clear the search box. This is a great way to quickly add hundreds or thousands of tracks to a playlist instantly!
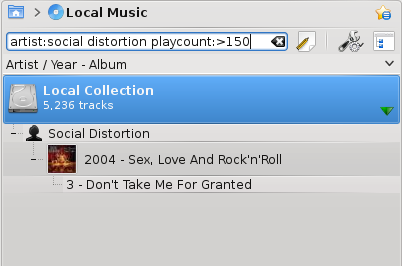
To search in a specific tag, type tag:value into the search bar. Operators like “>” and “<” can be used to create more general conditions. Several conditions can be used together by separating them by a space character. For time conditions, use the following abbreviations: d=day, w=week, m=month, y=year.
The following tags can be searched:
Album
Artist
Bitrate
Composer
AlbumArtist
Genre
Playcount
Rating
Sample Rate
Score
Title
Track
Year
BPM
Along with tags, the following can also be searched:
Comment
Filename
Disc number
Length
Filesize
Format
Added (to Collection)
First played
Label
Last modified
Numerical tags can use the following operators to create a condition:
Equal: “:”
Less than: “<”
Larger than: “>”
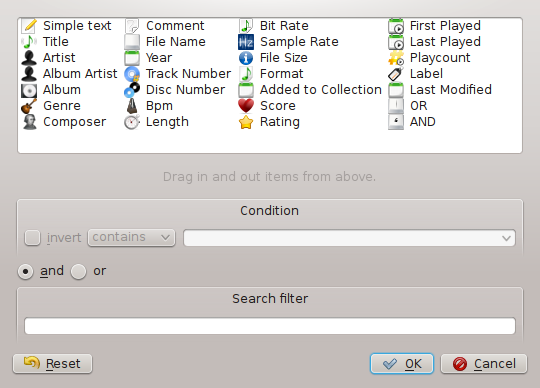
If you prefer to build your searches more programatically, drag down the icons for the search terms you want, and drag to change search-term order. You may search by: Simple text, Title,
Artist name, Album Artist Name, Album Name, Genre, Composer, Comment, Filename,
Year, Track Number, Disc Number, BPM,
Length, Bit Rate, Sample Rate, File Size,
Format, Added to Collection, Score, Rating,
First Played, Playcount, Label, Last Modified.
You can also add OR and AND here.
Select a term and check Invert condition to exclude items matching this term from the results. Choose AND or OR for all terms in this search. If you choose AND, all search-terms must be present.
If OR, any matches will show up.
Of course, clicking ![]() removes your selections.
removes your selections.
While organizing your collection in Amarok is a straight-forward task, you will be manipulating the actual files on your hard drive. Please be sure you have a backup of your files before you begin.
With the Organize Files dialog of Amarok you can easily manage the media files on your hard drive. When you change the naming scheme of media files, you will organize them, which is very powerful. To access the Organize Files dialog, right-click → in the Media Sources pane and the menu interface will pop-up.
Warning
Using this option will move the files to a new location, so you not only need appropriate rights for both the origin and the destination location, but also enough space, usually the double of the total file size to have the action perform smoothly. If you are unsure, do NOT use this option.
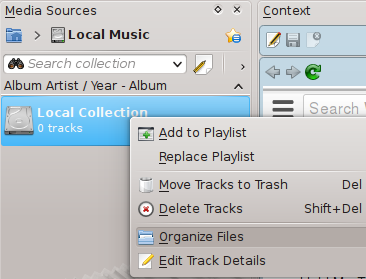
Context menu to Organize Collection dialog
If the option Organize Files does not appear, you may have Merged View on (toggled by ![]() ). In order to safely organize your files, you need to see your collections separated, not merged.
). In order to safely organize your files, you need to see your collections separated, not merged.
After selecting the option Organize Files you will first see an additional option that allows you to move the files to a new location, as well as transcode them at the same time. Depending on the codecs you have installed on the system, some format options might not be available and will be grayed out:
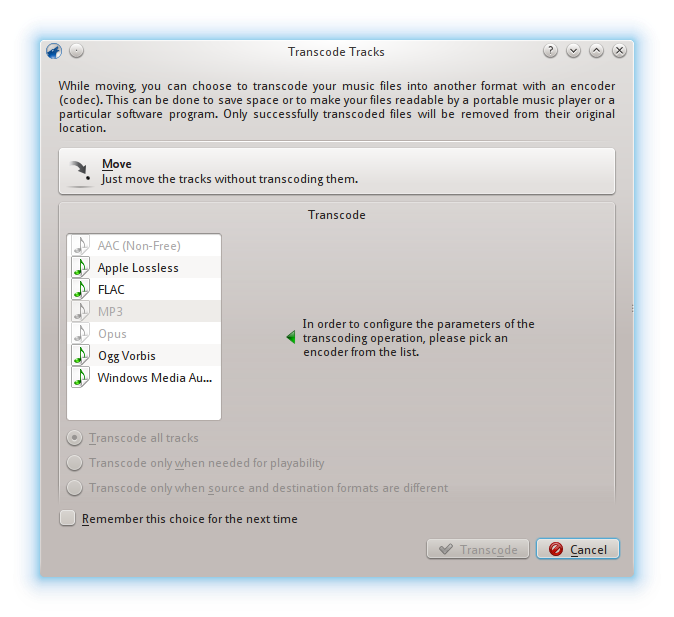
First screen when choosing the Organize Files option
For more information about Transcoding, please see the Transcoding section.
After clicking on the Move button on top of the screen, the following interface will show:
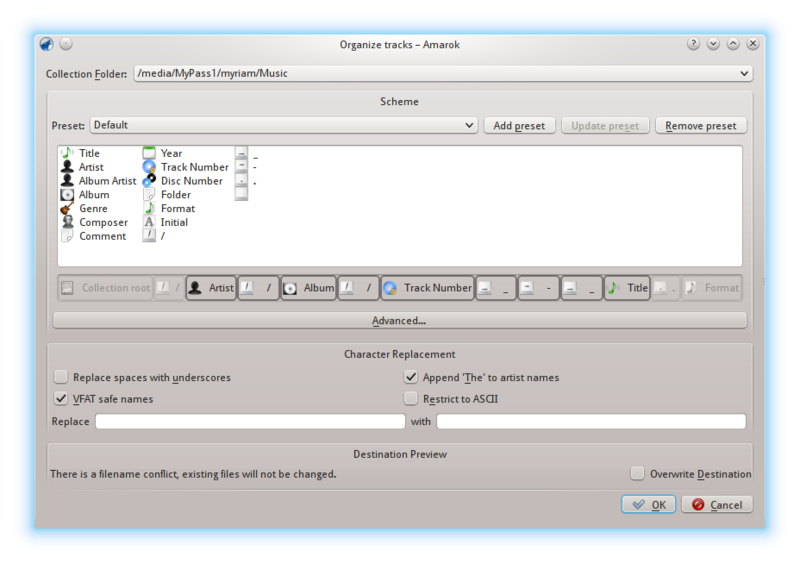
Organize Tracks dialog
| Interface Item | Description |
|---|---|
|
Collection Folder |
The default collection folder. Set multiple folders in → . |
|
Token Bar |
Drag and drop multiple tokens here to change the naming scheme of your media files. Only available in Basic view. |
|
Format Presets |
When you have created your naming scheme, save it as a preset by clicking Save Preset. Remove presets by clicking Remove Preset. |
|
Replace Spaces With Underscores |
If checked, converts spaces in filenames to underscores. |
|
Ignore 'The' in Artist names |
If checked, artists' names starting with 'The' will instead be styled ', The'. |
|
VFAT Safe Names |
If checked, replaces characters that are incompatible with MS-DOS or VFAT file systems with underscores. Most people can leave this option enabled. |
|
Restrict to ASCII |
If checked, all non-ASCII characters will be replaced with underscores. Do not check this option if you have non-English characters in your tags. Most people can leave this option unchecked. |
|
Custom Character Replacement |
Replace the tag expressions you write under the Replace box with character strings you write in the With box. Useful if there are mis-spellings in CDDB. |
|
Destination Preview |
Shows the original naming scheme of your media files and how they will look after the changes are applied (not available since ver. 2.4.2). |
|
Overwrite Destination |
If checked, overwrites files of the same name without asking for further confirmation (not available since ver. 2.4.2). |
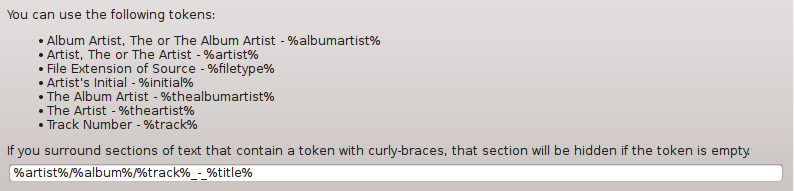
The code version of the Token Bar, which allows you to code the name format of media files. Activate it by pressing Advanced... in the interface menu. To change back click Basic....
Enclose conditional inclusion arguments such as CD number in braces, like this:
%artist%/%album%{/Disc %discnumber%}/%track% %title%
Note: formerly, the coding was %token, as of 2.4 it is %token%.
Beginning with version 2.7, Amarok allows syncing the play-related metadata and statistics of the tracks (such as rating or play count) between any of your collections which show up in → and with the Last.fm web service, if you choose to use Last.fm.
At any time, you can start manual synchronization from →
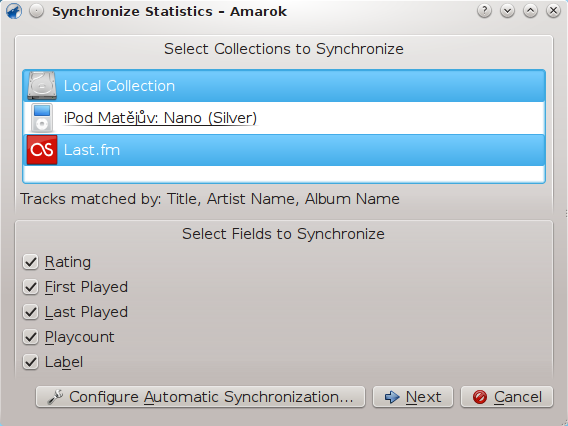
From here, you can start a synchronization between the collections you select here, which will default to what you have configured in the Amarok Metadata configuration.
When syncing, Amarok will show a dialog window which states the conflicts and statistics of the syncing that has recently been in progress. In this window you will be able to see three tabs: Matched Tracks, Unique Tracks and Excluded Tracks.
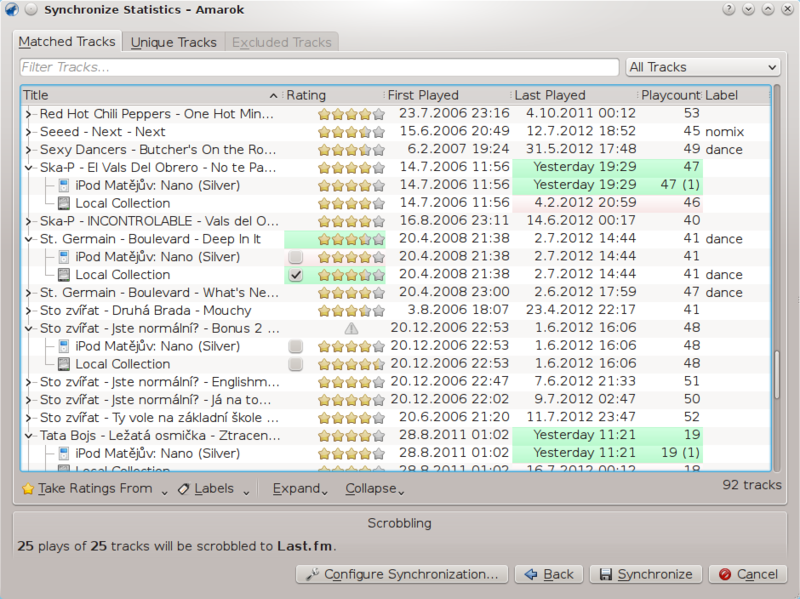
- Matched Tracks
This tab will show all the tracks that Amarok has found in more than one collection, and reflects conflicts. When tracks are grouped, you can see two types of background: light green, and light red. A light green background indicates the new or updated field, whilst a light red background will indicate the old/overwritten field. You do not need to solve all conflicts listed here; the particular field of the listed tracks are not going to be synced if you do not resolve the conflict.
- Unique Tracks
These are tracks found in only one collection. You can use it as a difference view. Track dragging is supported here.
- Excluded Tracks
These are tracks that are not synced because of different reasons, such as identical metadata, so as not cause to disorder in the database.
If you have the Last.fm plugin enabled and configured correctly with your Last.fm account, you can choose to also synchronize your Amarok play counts, ratings and labels with your Last.fm Library. The sync takes some time, but you may continue using Amarok while it is syncing. Please note that Unattended Synchronization (which will be explained later on) is not possible with Last.fm, and synchronization from Last.fm to Amarok needs to be initiated manually.
Last.fm enables by default a feature that will auto-correct common misspelling during the sync. It can happen that even if you scrobble many track plays, it does not show up in Matched Tracks as Last.fm knows the track under a slightly different name.
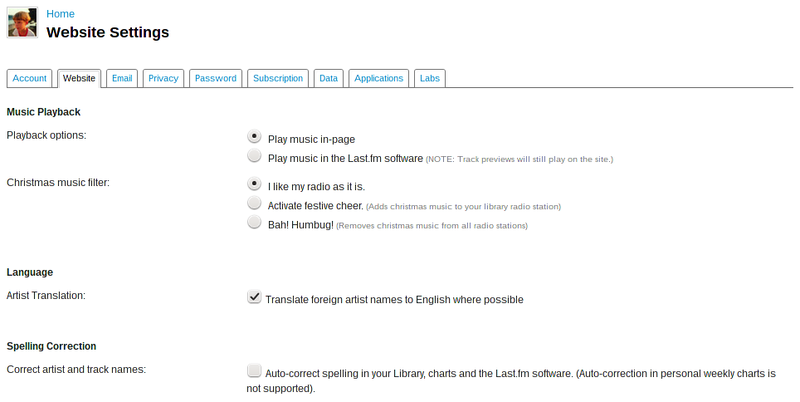
You can disable this feature on the Last.fm site, and changes will be applied also to your past scrobbles. You have two options:
- Off
Tracks are matched properly, but if you change your tags after some time, your play-count will be split in two tracks.
- On
You can play-count the tracks even if tags are changed after some time, but you will have to use Last.fm preferred spelling.
Important
Please note the dialog will only appear in the case of iPods.
When you connect a device that is able to sync with your collections, a pop-up like this will appear.
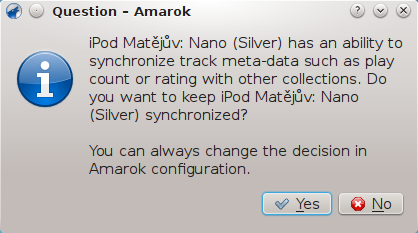
For unattended syncing to start, you only need to click Yes in the pop-up. Amarok will work in the background, so the metadata in your device including ratings, first/last played times, play counts and labels will be synced with other collections configured to participate in the synchronization, and tracks recently played on the device will be scrobbled to Last.fm, if it is enabled. The process will not ask for user interaction unless any conflict is found in the middle.
Often it is very useful to share your media files across the network, especially if you want to use it on different computers. This can be done in different ways:
Amarok is able to play music from an Ampache media server. If you want to install a server, see here for more information.
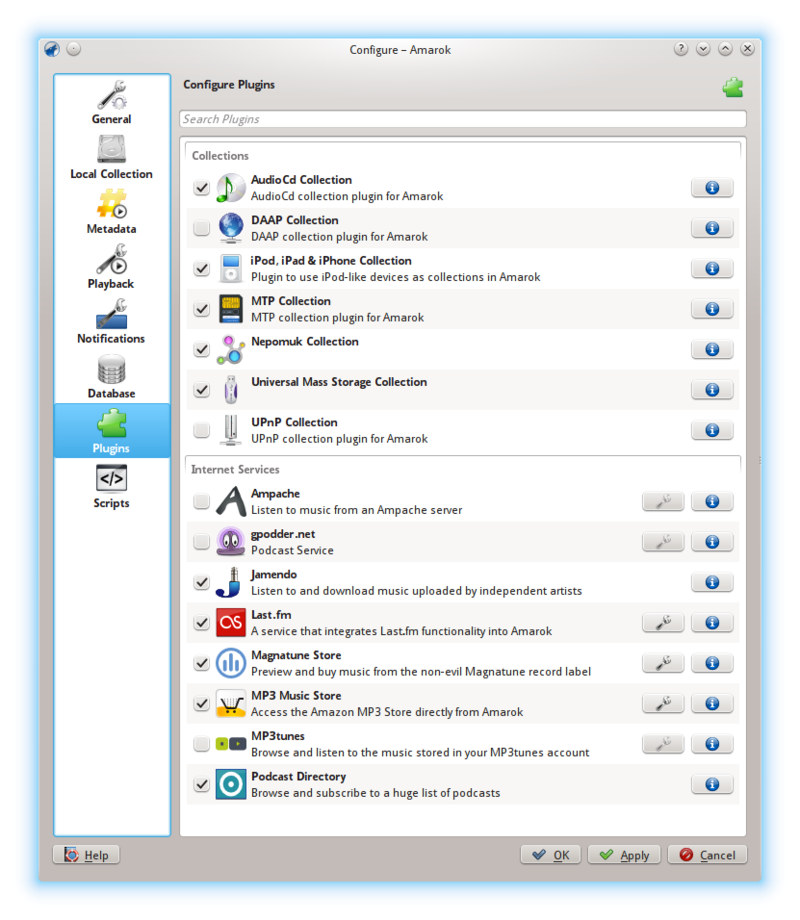
Activate the Ampache service using → → . Click on the ![]() icon to open the configuration dialog.
icon to open the configuration dialog.
Select Add Server:
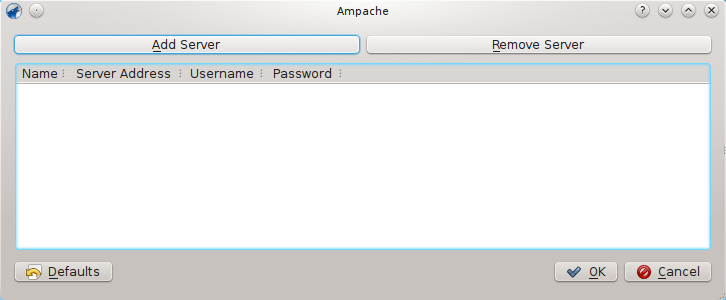
Configure the service with the data entered on the server:

Now the Ampache service should appear in → .

DAAP is a protocol to share media over a network. It was first used for the iTunes music player, but is used widely now. The current state is that the DAAP-plugin won't work with a recent iTunes, the Firefly media server is known to work.
Amarok will show the tracks from the server in the → pane if you enable the DAAP Collection in → → → . If the collection is not showing up, click the ![]() icon to be sure you are not in Merged View.
icon to be sure you are not in Merged View.
Samba is a free implementation of the SMB/CIFS protocol which is used to share files and printers in a network. Most modern file managers like Dolphin and Nautilus support this protocol.
You need to mount the share to use it in Amarok. To do this, you need to install the package smbfs. Use the command
sudo mount -t cifs //host/share /mount-point/
to mount the share. After that you can use it like a local folder and add it to your local collection.
The easiest way is to use your file manager. On Debian-based distributions like Ubuntu™ you can install a Dolphin extension to manage shares using
sudo apt-get install kdenetwork-filesharing
Open the properties of a folder in Dolphin and switch to the Share tab.
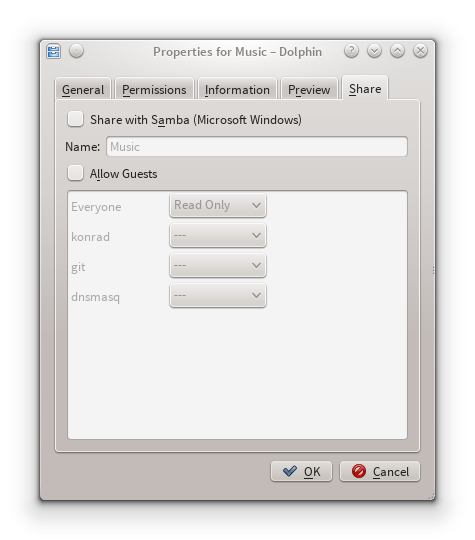
To share the folder, just check the Share with Samba (Microsoft Windows) field and set the share name under the Name field. Check the Allow Guests checkbox to allow anonymous users access to the folder.
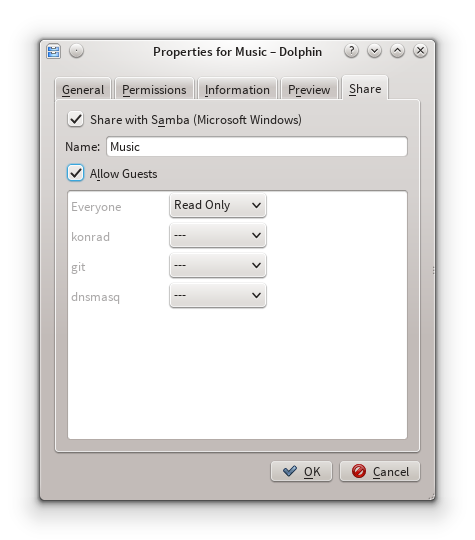
The folder should now be accessible to the network. Please see the Client section for details on how to use it in Amarok.
UPnP is a set of protocols to share media on the network. It is also supported by a wide range of residential gateways and Network Attached Storage devices. UPnP support is now commonly marketed as DLNA.
Amarok has a built-in UPnP media share client so it can play tracks shared on the network. To enable it, use → → → and check the box by the UPnP Collection plugin.
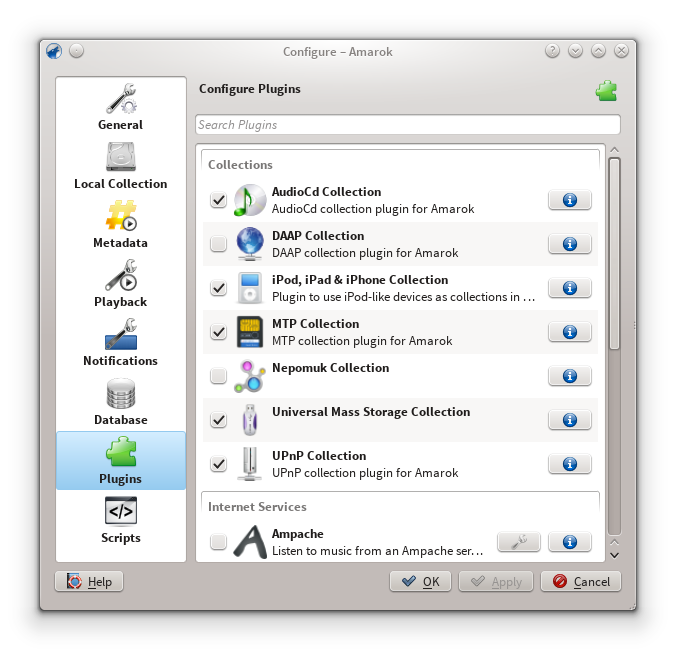
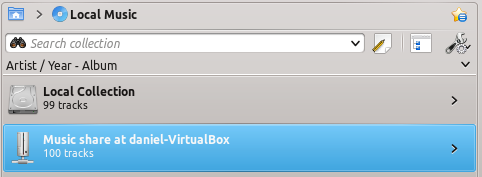
When a media share is discovered it will be shown in Local Music.
The UPnP feature depends on KDE's UPnP media server support. As of now (2015) there is no working UPnP kio-slave available.
Amarok 2.2 and above support an external MySQL database as a backend.
First you need to install an MySQL server. On Debian-based distributions like Ubuntu you can use
sudo apt-get install mysql-server mysql-client
to install it. You will be asked to specify a password for the root-account for the database. The mysql-client package is needed in order to execute some of the commands in this document, but it's not fundamental to the use of Amarok.
Connect to the local database using
mysql -u root -p
You will be prompted for the password for MySQL's root user. You will get the
mysql>
prompt.
Create a new user amarokuser with the password amarokpass using the
CREATE USER 'amarokuser'@'localhost' IDENTIFIED BY 'amarokpass';
command. Amarok needs its own database, which is created with
CREATE DATABASE amarokdb;
Give the new user access to the database by entering the
GRANT ALL ON amarokdb.* TO 'amarokuser'@'%' IDENTIFIED BY 'amarokpass';
command, where % is a wildcard to allow all hosts to connect to the database. Now use the
FLUSH PRIVILEGES;
statement to reload various internal caches used by MySQL. Finally
exit
closes the MySQL prompt.
By default the server can only be accessed by the local host. To change this you need to edit the file /etc/mysql/my.cnf and adjust the address near bind-address to the one your server listens on the network. 0.0.0.0 listens on all interfaces. After that you need to restart the server using
sudo service mysql restart
Open the configuration dialog by clicking → → . Enable the checkbox and enter the user data.

You need to restart Amarok so that the changes take effect.
If you want to maintain the statistics, etc. that you have in the embedded MySQL database from before Amarok 2.2, you can do the following:
First, start Amarok 2.2+ at least once to give the database a chance to update to the latest schema version.
Next, kill the running MySQL service
sudo /etc/init.d/mysql stop
and start a MySQL daemon from your ~/.kde4/share/apps/amarok directory (--defaults-file MUST be the first option!):
/usr/sbin/mysqld --defaults-file=`pwd`/my.cnf --default-storage-engine=MyISAM --datadir=`pwd`/mysqle --socket=`pwd`/sock --skip-grant-tables
The skip-grant-tables means you can use any password or username to connect to it. 'localhost' will not work, the MySQL client will try to use a UNIX® socket. Using 127.0.0.1 as the host makes it work. Some systems may restrict this access through apparmor or SELinux®. They can be temporarily disabled with
sudo /etc/init.d/apparmor stop
Now, run mysqldump, passing in the -S option to specify the local socket. This will dump your old embedded DB out to a SQL file.
mysqldump -S sock amarok > amarok.mysql
You can then restart your MySQL service and load this SQL file into your MySQL server. You'll have needed to already run the GRANT statement above and create an Amarok database (“CREATE DATABASE amarok;”):
sudo /etc/init.d/mysql stop
mysql -u amarokuser -p amarok < amarok.mysql
Note
You may need to re-scan your collection in Amarok after completing this.
Use Amarok to play music from media devices such as MTP devices, iPods, and generic USB devices.
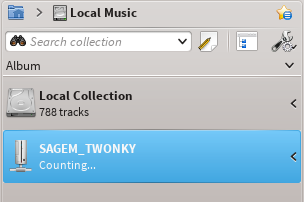
Connect your media device using the USB cable. The device notifier applet in KDE will automatically pop up with a list of all available media devices. Click on the ![]() icon to access your device.
icon to access your device.
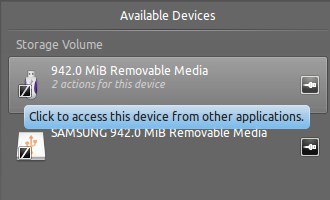
Or just wait until your device shows up in Amarok, which will take anywhere from a few seconds to a minute or more, to scan the device for music tracks. Until then the vfat volume will show 0 tracks.
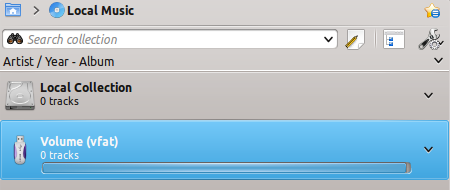
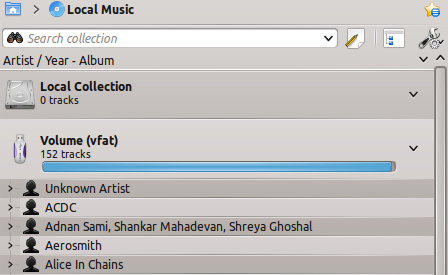
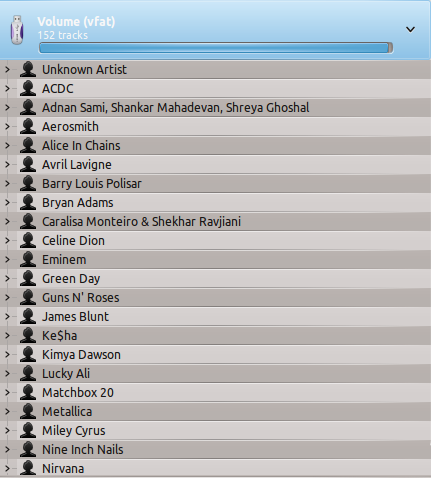
After the scan, Amarok will display all the music tracks available in the Media Device, which you can then move to the Playlist to play them, or copy or move to your Local Collection.
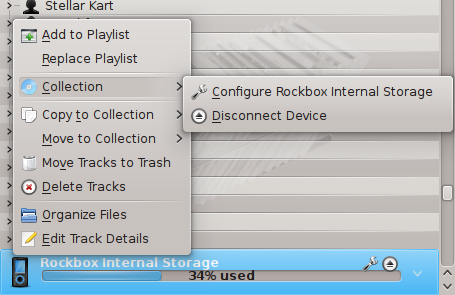
| Menu Item | Description |
|---|---|
|
Add to playlist |
Adds all the selected tracks from the media device to the current Amarok playlist. |
|
Replace the playlist |
Clears the current Amarok playlist and adds instead all the selected tracks from the media device. |
|
Configure Device |
Opens a dialog box to edit configuration options for the device. |
|
Disconnect Device |
Disconnects the device from the computer. |
|
Copy to collection |
Copy all the selected tracks to the Local collection or to any other media devices connected. |
|
Move to collection |
Move all the selected tracks to the Local collection or to any other media devices connected. |
|
Move to trash |
Moves all the selected tracks from the media device to the trash. |
|
Delete tracks |
Deletes all the selected tracks from the media device. |
|
Organize Files |
Organizes tracks based on the configuration for the device. |
|
Edit track details |
Opens a dialog box to edit details of the selected tracks from the media device. |
As of Amarok 2.8, the following devices should work with Amarok:
Generic Media Players connected through the UMS protocol.
iPods/iPhones, depending on their support by the libgpod library. The status depends on the version of this library installed on your system, please refer to the libgpod support listing on their homepage.
limited support for devices using the MTP protocol, the support for new Android devices is currently implemented for the next Amarok version.