Table of Contents
While the basic functionality is useful enough for someone who wants a simple, yet powerful media player, the best feature in Kaffeine is to use it as a GUI frontend to watch and record digital TV.
Since Kaffeine version 2.0, the digital TV support uses libdvbv5 and was extended to support new standards like DVB-T2 and ISDB-T. Extending its support for newer digital TV standards is now simpler. Also, since it uses the Linux® DVB version 5 API, it supports frontends capable of implementing multiple digital TV standards.
Setting the TV configuration on Kaffeine is as simple as open the item from the menu bar and select the option. A pop up window will open, allowing setting the parameters to be used:
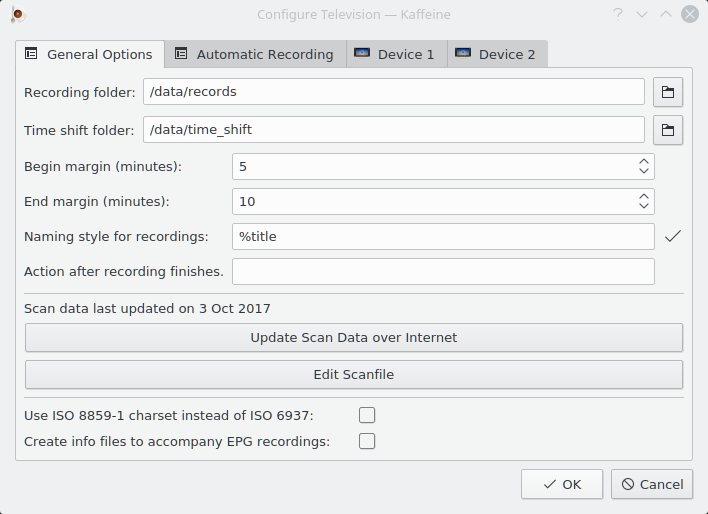
The menu allows setting the device-independent settings.
The Recording folder sets the location where all TV program records will be stored.
The xmltv file name (optional) specifies a file name with EPG data that was retrieved via an external grabber. When this option is used, you'll likely set Disable parsing Electronic Program Guide (EPG) data from MPEG-TS tables
The Disable parsing EPG data from MPEG-TS tables disables the Electronic Program Guide (EPG) data to be retrieved from the broadcasted signal. Use it in order to save some CPU time, if your broadcaster doesn't send reliable EPG data.
The Time shift folder is used in conjunction with the
pause button
( ) of the media player screen. When the button
is pressed, a time shift file will be stored at the location pointed by this
menu option.
) of the media player screen. When the button
is pressed, a time shift file will be stored at the location pointed by this
menu option.
The Begin margin and End margin options are used to setup a sort of “security margin” in order to avoid losing the beginning and the end of a program, as the time stamps at the program guide may not be precise. So, it actually starts recording a few minutes before the Start time defined in the . The exact amount of time before is defined via Begin margin. Kaffeine extends the record by the amount of time defined by End margin after the end of the program.
The Naming style for recordings option is used to setup how Kaffeine will name a program. Several macros can be used to dynamically change the name of the record:
%title- Title of the program, as seen at the and menus;%day, %month, %year, %hour, %min, %sec- Fields from the time stamp with represents the time when Kaffeine starts recording a program;%channel- Name of the channel that streamed the program.
The Action after recording finishes option is used to setup an optional command to be executed when Kaffeine stops recording a program.
Clicking at the Update Scan Data over Internet option makes Kaffeine to check if a new channel scanning definition file is present at KDE's site.
Kaffeine uses a file called scanfile.dvb to store a list of known digital TV channels per Country and City. This file is kept in sync with the contents of the dtv-scan-tables tree, maintained by LinuxTV community. For more details, please see the dtv-scan-tables wiki page.
When the button is clicked, Kaffeine will download the latest version of the channel definitions and store on a user-specific local data file, overriding any contents of a previous one.
Please notice that, in order to use the newest definitions, it is required to close the TV configuration dialog and reopen.
The Edit scanfile option allows editing the file, which can be useful to add a new set of channels, while the upstream file is not updated. If you need to use it, please consider sending an update to dtv-scan-tables for others to also benefit from the new channel definitions.
The Use ISO 8859-1 charset instead of ISO 6937 option allows selecting the default to be used on MPEG-TS messages that don't explicitly set a charset. If not set, it defaults to using ISO-6937 encoding. If set, the default changes to ISO 8859-1.
The Create info files to accompany EPG recordings option enables the creation of ancillary files for scheduled records with the contents of the program guide for records made via the .
Most digital TV broadcasters send program information via the broadcast information, encoded on a MPEG-TS stream. However, some of them use non-standard encodings for those data. As an example, at the United Kingdom, HD programs EPG data are usually stored using some a proprietary format. Other providers just don't fill the EPG data, or the information there is not reliable.
Since Kaffeine 2.0.17, it is possible to disable parsing the EPG data from the broadcasted channels, using an external program to retrieve them. In order to disable, just set the Disable parsing Electronic Program Guide (EPG) data from MPEG-TS tables box. You can now set an external parser to produce a file with EPG data, and use the xmltv file name (optional) to specify the file name of the produced file. The produced file should use the XMLTV format, as described on its DTD. See XMLTV File format for more information.
When Kaffeine is set to use an XMLTV file, it will automatically detect any file changes on it. When a change happens, it will open the file and parse its contents, updating EPG data accordingly.
It should be noticed that the XMLTV file has a table with associates its own internal representation for channels with the expected channel name at the digital TV broadcasted data. Kaffeine will only retrieve the EPG data if the channels there match the ones inside Kaffeine's channel list. So, you need to ensure that the channels there matches what Kaffeine expects. If it doesn't match, you could use a command line XML editor program in order to add the missing channel information.
For example, if you have a xmltv grabber program retrieving the file named original_xmltv_file.xmltv, you could use the xmlstarlet program to add missing associations. So, if you want to associate the XMLTV channel named as channel.foo.uk with a channel whose Kaffeine name is FOO, you could run this small script:
channel="xmltv.channel.pt"
name="DVB_CHANNEL"
xmlstarlet ed \
	-s "tv/channel[@id='$channel']" -t elem -n display-name \
	-v "$name" original_xmltv_file.xmltv > new_xmltv_file.xmltv
mv new_xmltv_file.xmltv /tmp/new_xmltv_file.xmltv
Then, set Kaffeine to use the new /tmp/new_xmltv_file.xmltv file.
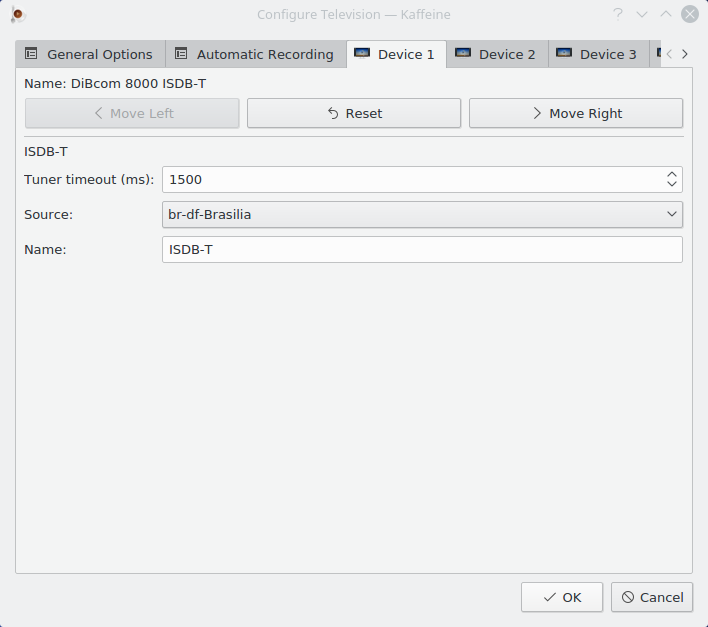
The tabs have the per-device setup. Usually selecting the country and the city in the Source combo box (or using one of the Autoscan sources) is enough for non-satellite configurations. The same happens for devices that support multiple TV standards. On those devices, you need to setup the Source for each TV standard:
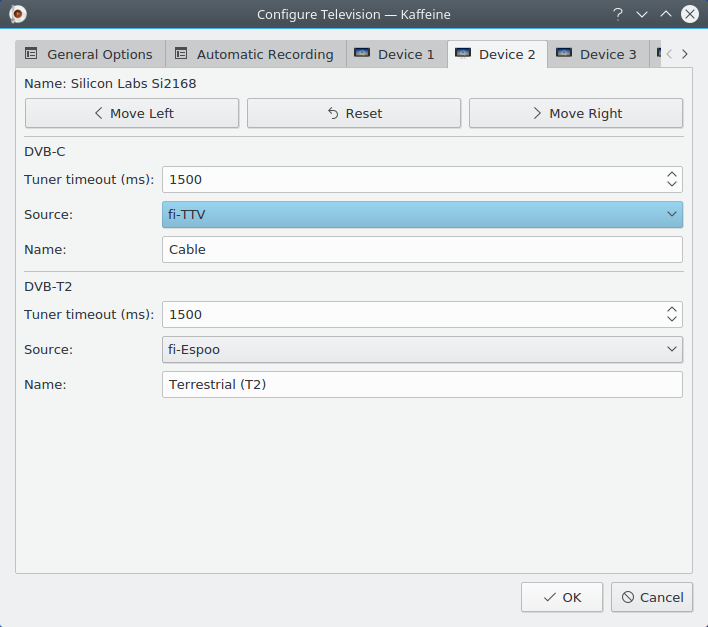
The Tuner timeout specifies the amount of time the channel scan will wait to get a signal lock. Usually, the default is enough for most devices, but if the device is too slow to lock, such value can be increased.
The Name specifies the name associated with source that will appear selecting item from the menubar and option, for settings panel.
The configuration for satellite devices (DVB-S, DVB-S2) are more complex, as there are different satellite system arrangements that are possible. Also, on satellite systems, it is usually up to the device to power up an amplifier located at the satellite dish - called LNBf - via a DC voltage.
Also, as satellite systems use a wide bandwidth and accept signals using different polarities, it is common to use a protocol - called DiSEqC - in order to select a range of channels to be received.
The first step is to teach Kaffeine about the satellite configuration via the combo box:
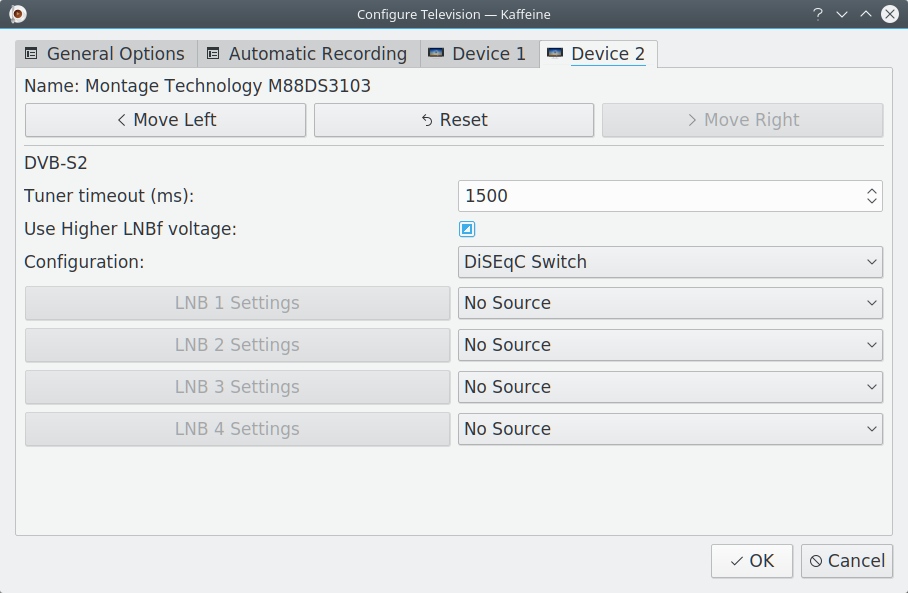
The following values are possible:
DiSEqC Switch- The antenna cable is connected to a DiSEqC switch or the LNBf requires DiSEqC commands to select a range of channels. This is the most common setting. It allows having up to 4 satellites connected at the same time, each with its own dish. For each satellite, you need to set the configuration for the LNBf at the dish pointing to it.USALS Rotor- The antenna cable is connected to a single dish with a USALS Rotor, controlled via DiSEqC. Multiple satellites can be configured, as the rotor will change the dish position when a different satellite is chosen. You need to specify the position of the dish (latitude, longitude).Positions Rotor- The antenna cable is connected to a single dish with a Rotor with a set of fixed positions, controlled via DiSEqC. Multiple satellites can be configured, as the rotor will change the dish position when a different satellite is chosen.Disable DiSEqC- The antenna cable is connected to a dish without any elements supporting DiSEqC. This setup is typically used with multipoint bandstacked LNBf, where all channels are present at the same time at the antenna cabling.
On a typical satellite system, the LNBf uses the power up voltage to select between a lower voltage (13V) for vertical or circular right polarization and a higher voltage (18V) for horizontal or circular left polarization. However, due to cabling loss, sometimes the LNBf doesn't understand the high voltage and several channels won't tune or will tune wrong. So, a few devices offer an option to increase the voltage to a higher setting (14V or 19V). This is enabled via the tri-state Use Higher LNBf voltage option. Three values are possible:
tri-state- Don't send a command to the device to adjust the voltage level. That's the default.unselected- Use normal values (13V/18V) for the DC voltage. Only select it if the device supports adjusting the level.selected- Use higher values (14V/19V) for the DC voltage. Only select it if the device supports adjusting the level.
When either DiSEqC Switch or Disable DiSEqC
options are used, the first step is to set the satellite that
will be used as a signal source, via a combo box on the right. With a
DiSEqC switch, it is possible to select up to 4 sources.
Each with its own LNBf. After setting the source(s), for each source, click at
the corresponding LNBf Settings button to open a popup
window to select the LNBf type inside the dish that corresponds to the source:
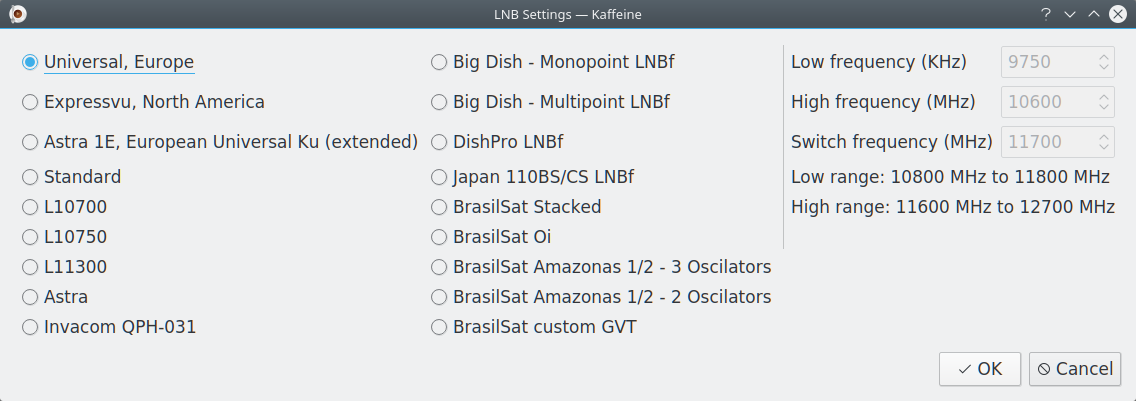
When a rotor is used, there is just one LNBf which is shared with multiple satellites. So, the next step is to select the LNBf type via the LNB Settings dialog.
For USALS rotor, the positioning is done via satellite position (latitude, longitude). So, just select the satellites that will be used via a combo box and click at the Add Satellite button.
For positions rotor, the positioning is done via a preconfigured position number. So, just select the satellite position at the number dialog on the left and the satellite via a combo box on the right and click at the Add Satellite button.
If a satellite was added by mistake, you can select the satellite and click at the Remove Satellite button to remove it.
After clicking on the button, the next step is to scan for the digital channels, using the item from the menubar and select option, for settings panel:
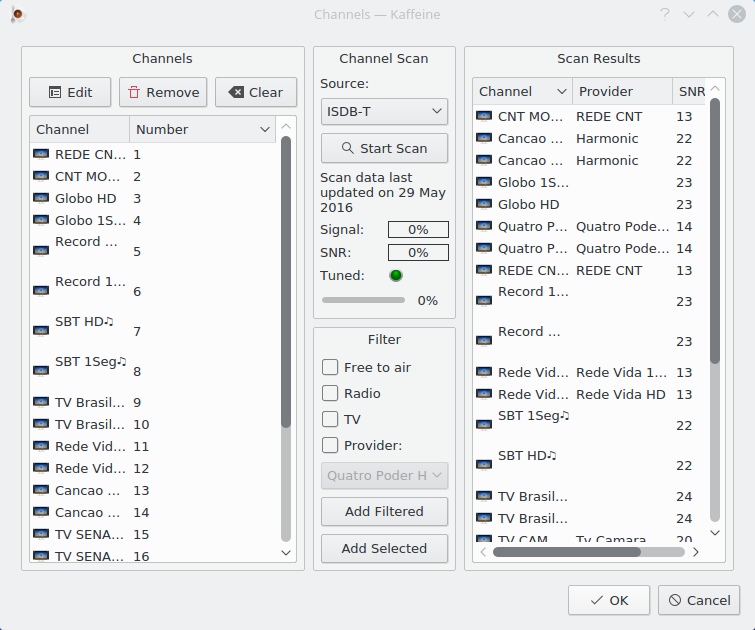
If more then one standard is supported, the Source combo box will allow you to select the one that will be used to scan. Don't forget to connect the device's antenna cable to match the standard that will be used.
When Kaffeine identifies a channel, it reads a MPEG-TS table called Network Information Table (NIT), which contains information about channels using different tuning parameters transmitted by the same broadcaster. On certain networks, it is possible that some tuning parameters to be stored on several NIT tables (called “other NITs”). This is more common on some cable and satellite systems. By selecting Search transponders for other Networks, Kaffeine is instructed to wait and parse all other NITs, which may make it to find more channels, at the cost of taking a lot more time to complete the channel scan operation.
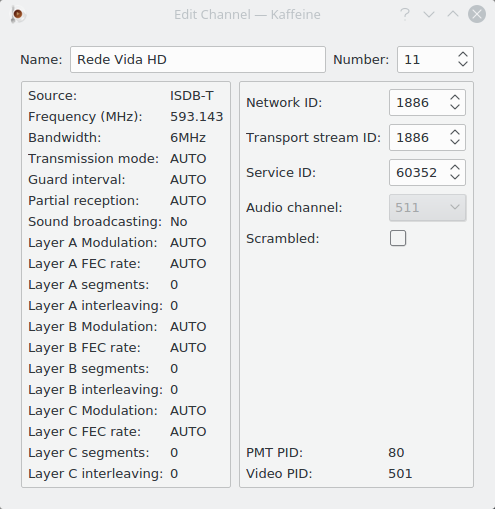
The channel scan operation is started by clicking on . Once finished, the discovered channels will appear on the right. These channels can be copied to the left side by clicking . It is possible to check the tuning parameters for the channel in the left side by clicking on the button. Some parameters are adjustable in the window that pops up.
Once the channels are saved, watching TV is as simple as clicking on the button in the main window: