This how-to explains the resizing of a partition that is becoming too full. See the following screenshot for the initial situation before resizing:
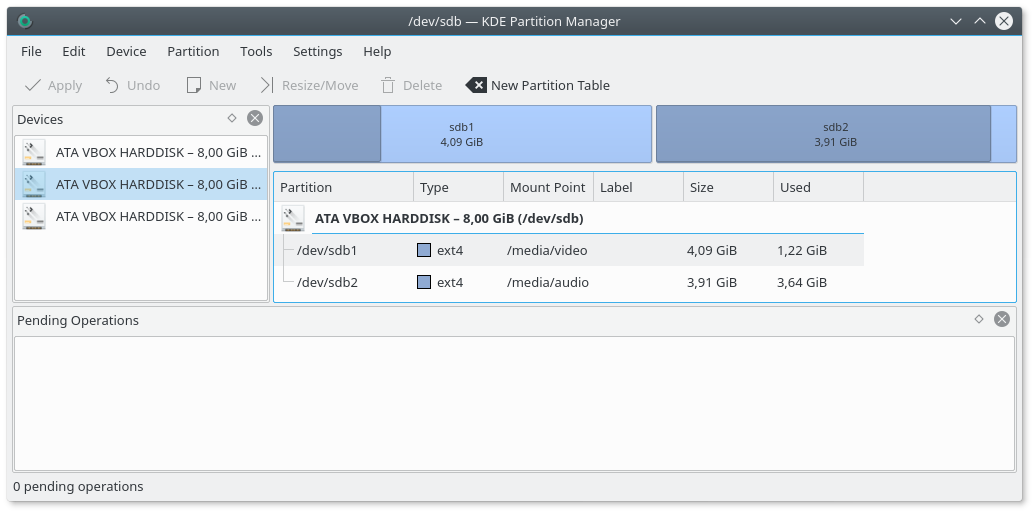
On device “/dev/sdb”, partition “sdb2” has only little free space left while the other partition, “sdb1”, is far from being full. For that reason it seems advisable to make the first partition a little smaller and grow “sdb2” so it has more free space available.
Note: You cannot modify mounted partitions.
In the screenshot above both partitions are not currently mounted. If one or both of them were mounted you would have to unmount them first using → .
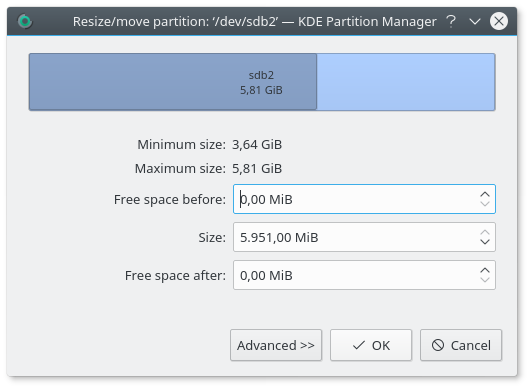
The first step is to make more room for the partition to grow, so start by shrinking “sdb1”. Click on the partition and choose → (Ctrl+R) . The following dialog comes up:
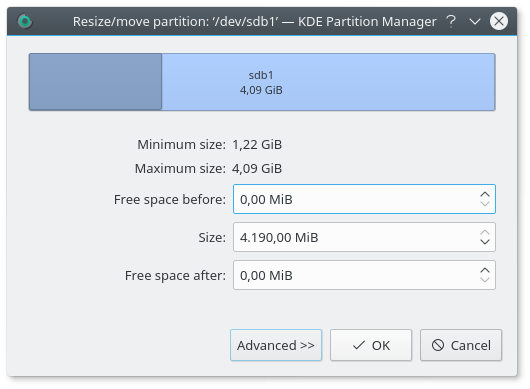
The dialog allows you to resize the partition in multiple ways. You can either drag the right handle to the left until the partition has the desired size or simply enter the size in the Size text field. Another possibility would be to adjust the size by clicking on the little arrows next to the text field, but that is a little tedious for larger changes.
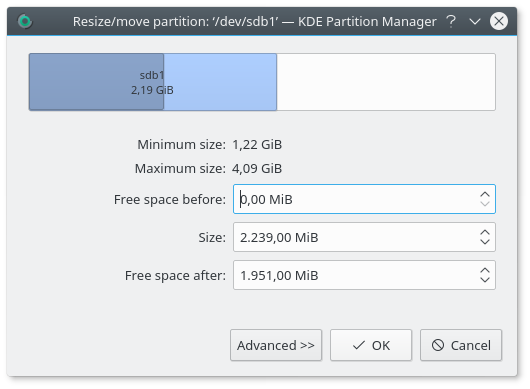
Whichever way you prefer for setting the new size, the dialog should now look like this:
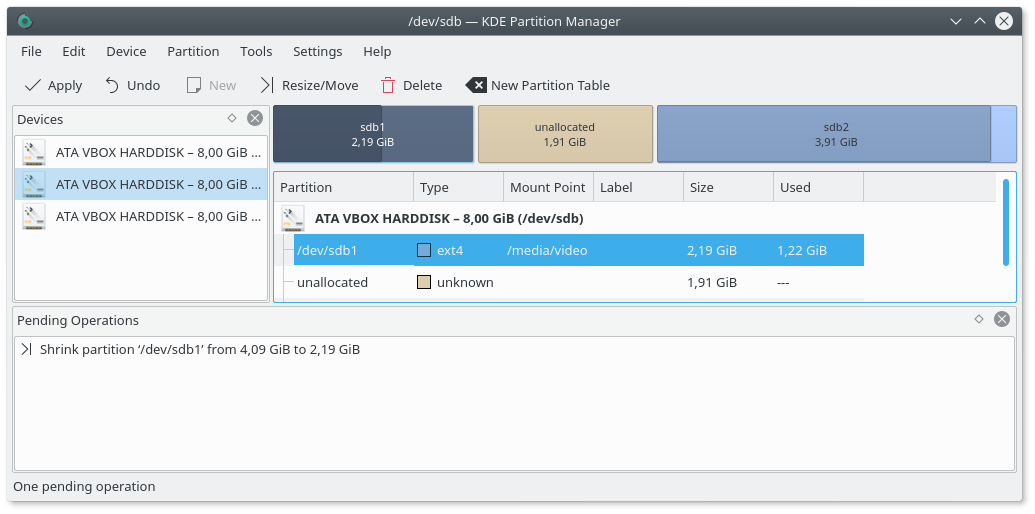
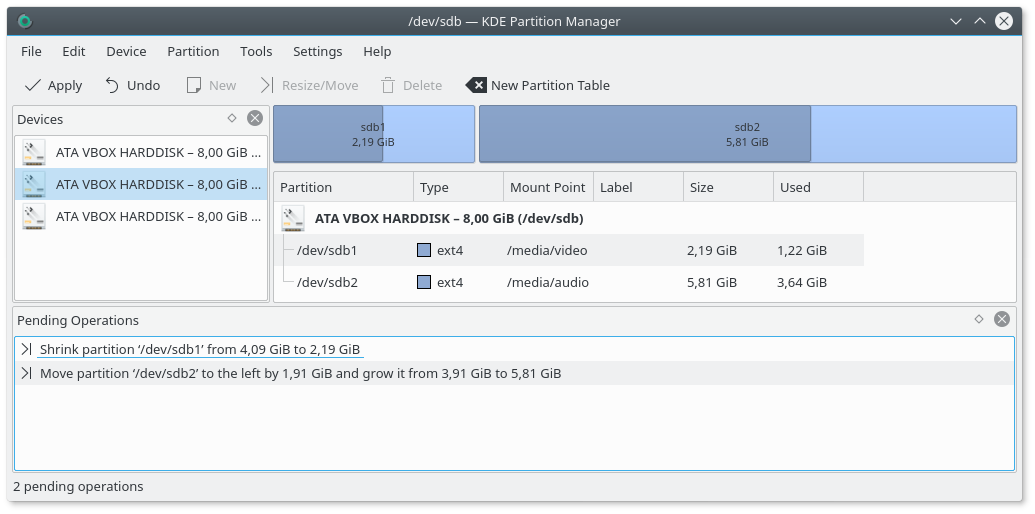
After you click on , a new operation is added to the pending operations list and the graphical view and tree view of the device are updated to reflect the new situation:
Note: Operations are previewed first before applying them.
Although the main window reflects the device's state how it will be after applying the new operation, the operation has in fact not been applied yet: While operations are pending you can still undo them (one by one using → (Ctrl+Z) or → to undo all of them) or quit KDE Partition Manager, and nothing will have been modified at all.
Now that there is some free space between the two partitions you can move and grow partition “sdb2”. First, click on “sdb2” and choose → (Ctrl+R) again. The resize dialog comes up once more, this time for the second partition. Drag its left handle to the leftmost end so that the dialog looks like this:
Be careful to make sure that the Free space before text field really does show “0 MiB” because otherwise there will be a little free space left between the partitions that will then be wasted.
Now click again. In the main window things now look like this:
This already looks like what you wanted, so choose → . A dialog box will come up and ask you if you are sure to apply the pending operations. Confirm this dialog box and KDE Partition Manager will begin executing operations:
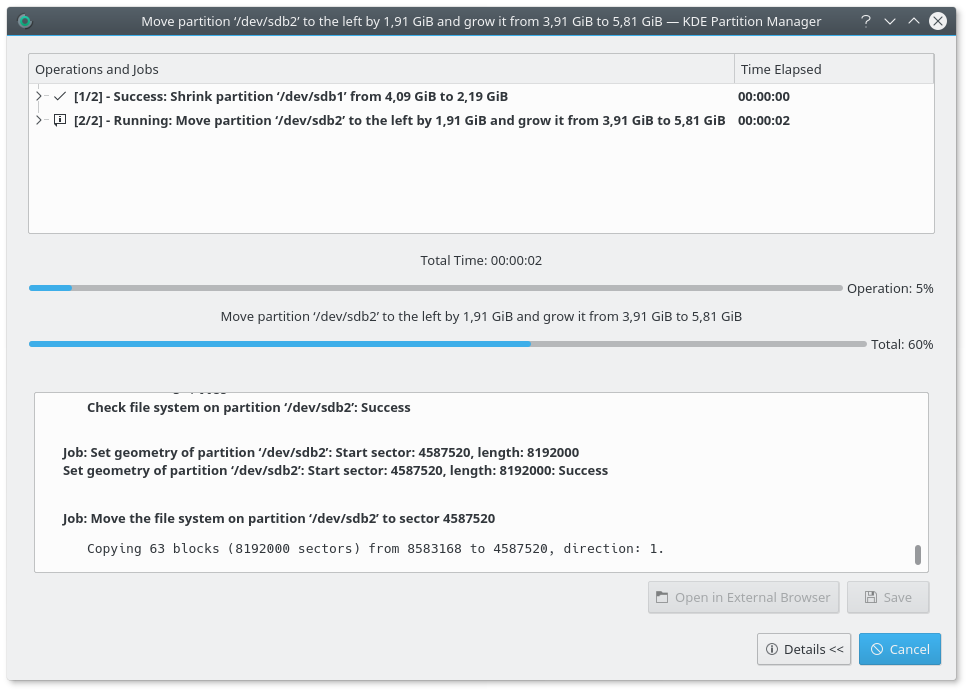
While operations are being executed you can click on the plus-sign next to each operation in the list to find out the jobs it is made up of and see which job is currently being run.
Resizing a partition in the way you resized “/dev/sdb2” above always means it has to be moved to the left first before it can be grown because partitions can never be grown to the left directly. Unfortunately, moving such a large partition will take quite some time. It is not unusual for an operation like this to take several minutes or even more.
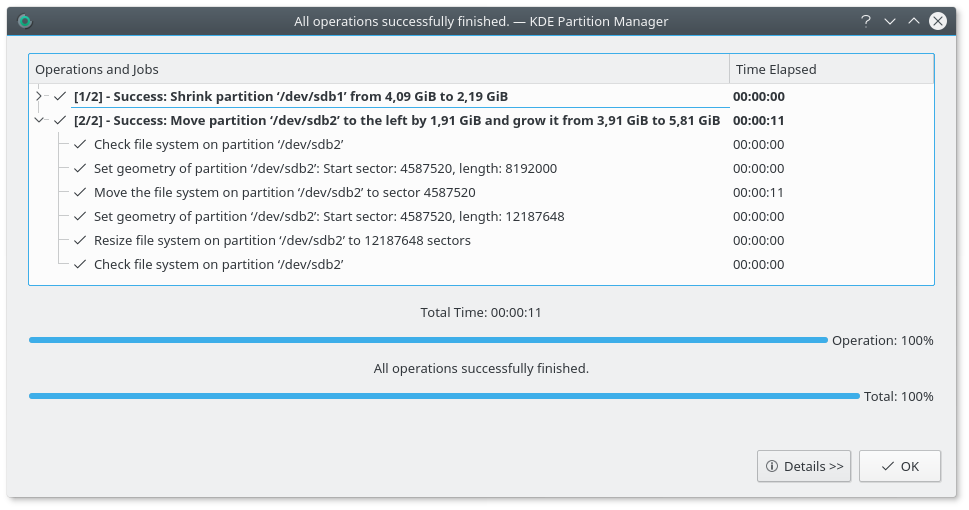
Finally, all operations will have been successfully completed:
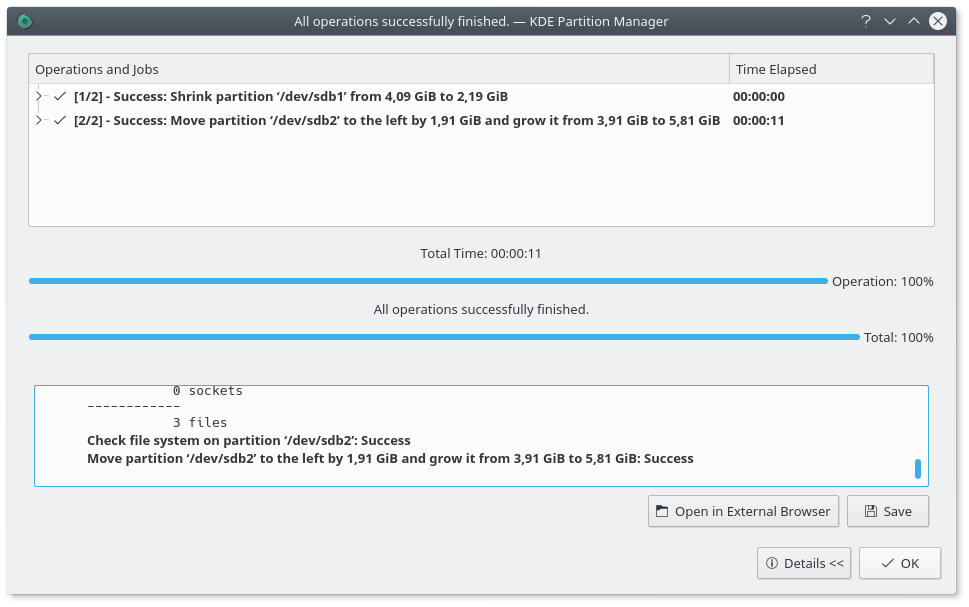
By clicking on you can now close the progress dialog and return to the main window. KDE Partition Manager will rescan your devices at this point so that might take a few seconds.
If you are interested in some more details about the operations that were just run click on . You will see the detailed report that is always generated (and updated on the fly) while KDE Partition Manager executes operations:
This report is particularly of interest if an error occurs while executing operations. A report shows each operation, each job and each external command that is being run and is thus very helpful when trying to track down problems.
You can save the report as HTML or view it in an external web browser.
Tip
Always save the detailed report as HTML when executing the operations fails with errors or warnings for later reference. You might also want to include it in a bug report you submit to the KDE bug tracking system at bugs.kde.org.
To hide the details again click on and to finally close the progress dialog click on .