See also Timeline section of the manual
Now comes the actual editing. Project clips are combined to the final result on the timeline. They get there by drag and drop: Drag some Napoli (assuming you are using the files provided above, as in the rest of this quick start tutorial; If not, please make sure your screen is waterproof, and perhaps tomatoproof) from the project tree, and drop it onto the first track in the timeline.
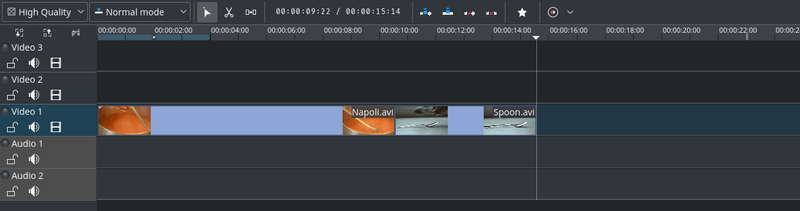
First clips in the timeline
Since some cutlery is needed as well, grab the spoon clip and drop it on the first track as well. Then drag the Napoli to the beginning of the timeline (otherwise the rendered video would start with some seconds of plain black), and the Spoon right after the Napoli, such that it looks like in the image on the left. (Where I have zoomed in with Ctrl+Wheel.)

Timeline cursor
The result can already be previewed by pressing Space (or the Play button in the project monitor). You will see the Napoli directly followed by a Spoon. If the timeline cursor is not at the beginning, the project monitor will start playing somewhere in the middle; you can move it by dragging it either on the timeline ruler or in the project monitor. If you prefer keyboard shortcuts, Ctrl+Home does the same for the monitor that is activated. (Select the Project Monitor if it is not selected yet before using the shortcut.)
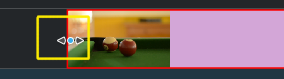
Resize marker
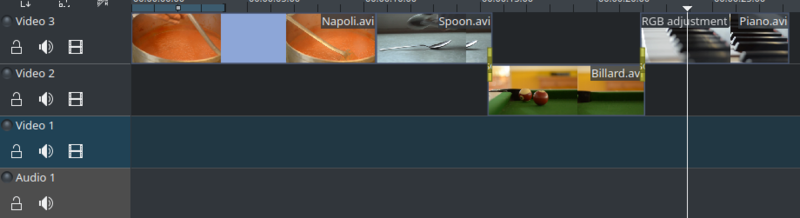
Since after eating comes playing, there is a Billiards clip. Add it to the timeline as well. For the first 1.5 seconds nothing happens in the clip, so it should perhaps be cut to avoid the video becoming boring. An easy way[5] for this is to move the timeline cursor to the desired position (i.e. the position where you want to cut the video), then drag the left border of the clip when the resize marker appears. It will snap in at the timeline cursor when you move close enough.
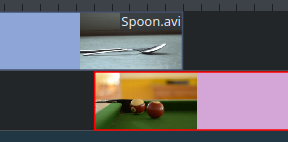
Overlapping clips
To add a transition between eating (the Spoon) and playing billiards, the two clips need to overlap. To be precise: the second clip should be above or below the first one and end some frames after the second one begins. Zooming in until the ticks for single frames appear helps here; it also makes it easy to always have the same transition duration, five frames in this case.
You can zoom in by either using the zoom slider at the bottom of the Kdenlive window, or with Ctrl+Mousewheel. Kdenlive will zoom to the timeline cursor, so first set it to the position which you want to see enlarged, then zoom in.
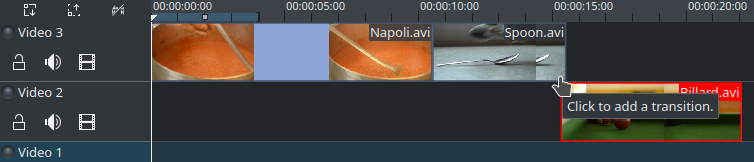
Transition marker
Now that the clips overlap, the transition can be added. This is done either by right-clicking on the upper clip and choosing Add Transition or, easier, by hovering the mouse over the lower right corner of the Spoon clip until the pointing-finger pointer is shown and the message “Click to add transition” appears. The latter, by default, adds a dissolve transition, which is in this case the best idea anyway since the Spoon is not required for playing.
The dissolve transitions fades the first clip into the second one. See also Transition section of the manual.
Let’s now add the last clip, the Piano, and again apply a dissolve transition. When adding it on the first track of the timeline, you need to click on the new clip’s lower left edge to add the transition to the previous clip.
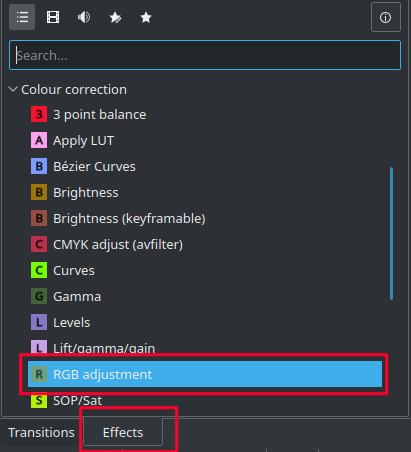
Effect List
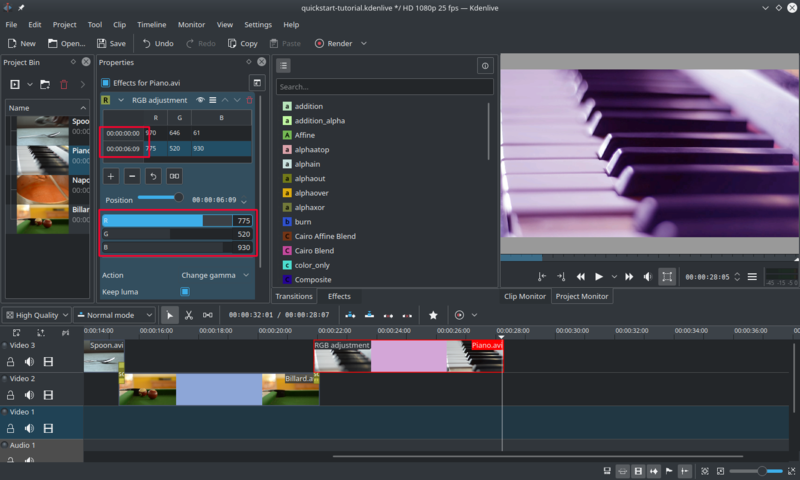
The Piano can be colourized by adding an effect to it. Select the piano clip, then double-click the RGB Adjustment effect in the Effect List. If it is not visible, you can get it via → .
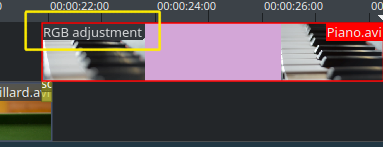
Once the effect has been added, its name will be added to the timeline clip. It will also be shown in the Properties widget.
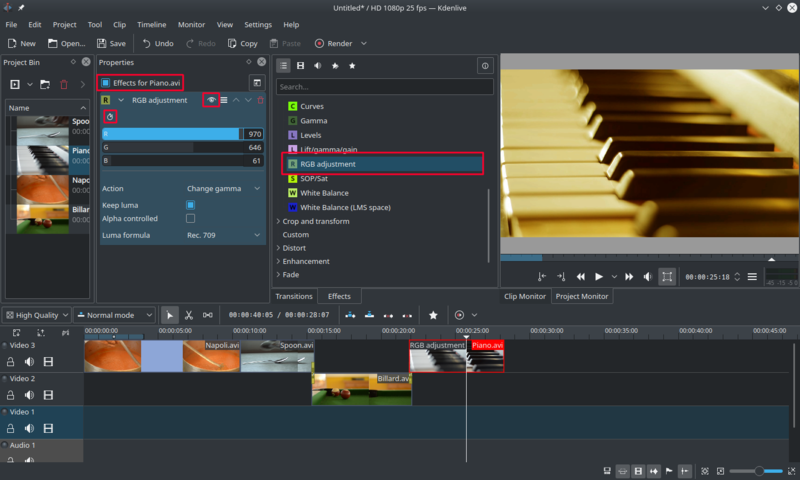
Effect Stack with RGB adjustment
To get a warm yellow-orange tone on the image, fitting the comfortable evening, blue needs to be reduced and red and green improved.
The values in the Properties widget can be changed by using the slider (middle mouse button resets it to the default value), or by entering a value directly by double-clicking the number to the right of the slider.
The Properties widget always refers to the timeline clip that is currently selected. Each effect can be temporarily disabled by clicking the eye icon, or all effects for that clip can be disabled using the check box at the top of the Properties widget (the settings are saved though), this is e.g. useful for effects that require a lot of computing power, so they can be disabled when editing and enabled again for rendering.
For some effects, like the one used there, it is possible to add keyframes. The framed watch icon indicates this. Keyframes are used for changing effect parameters over time. In our clip this allows us to fade the piano’s colour from a warm evening colour to a cold night colour.
Keyframes for effects
After clicking the keyframe icon (the clock icon framed in the previous image), the Properties widget will re-arrange. By default there will be two keyframes, one at the beginning of the timeline clip and one at the end. Move the timeline cursor to the end of the timeline clip, such that the project monitor actually shows the new colours when changing the parameters of the keyframe at the end.
Make sure the last keyframe is selected in the Properties list. Then you are ready to flood the piano with a deep blue.
Moving the timeline cursor to the beginning of the project and playing it (with Space, or the Play button in the Project Monitor), the piano should now change the colour as desired.
Keyframing was the hardest part of this tutorial. If you managed to do it, you will master Kdenlive easily!
See also Effects section of the manual.
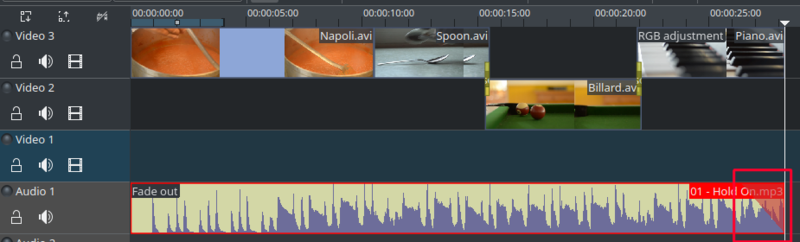
Audio fadeout
Since the clips do not provide any audio, let’s search for some nice piece of music, from your local collection or on web pages like Jamendo. The audio clip should, after adding it, be dragged to an audio track on the timeline.
The audio clip can be resized on the timeline the same way as video clips are. The cursor will snap in at the end of the project automatically. To add a fade out effect at the end of the audio clip (except if you found a file with exactly the right length) you can hover the top right (or left) edge of the timeline clip and drag the red shaded triangle to the position where fading out should start.[6]