When you choose the → → function, you will be presented with a dialog.
After you click the  button and choose the file to be imported, the screen will
look like this.
button and choose the file to be imported, the screen will
look like this.
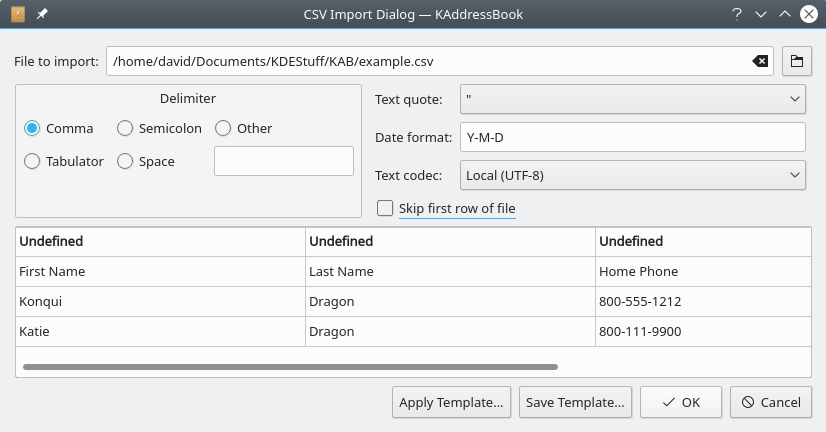
KAddressBook's “Import CSV File” dialog after choosing the → → function and selecting the file to be imported.
Use the “Delimiter” section of this dialog to specify which separator character defines the end of a field in the chosen input file. If quote marks are used to delimit fields with embedded separator characters, you may specify the style (single or double quote) used via the “Text quote:” drop-down box. If the input file contains dates, use the “Date format:” field to define the way dates have been encoded. The default is yyyy-mm-dd. If that's the wrong format, hover your cursor over the “Date format:” box and a handy set of formatting instructions will be displayed. If the input file is not UTF-8 encoded, use the “Text codec:” drop-down box to specify the binary encoding scheme to use. If the first row of the file contains column headers, check the “Skip first row of file” box to avoid importing the column headers as data. Use the “Undefined” boxes at the top of each column to specify which data fields are to be imported, and where they should be stored, as shown below.
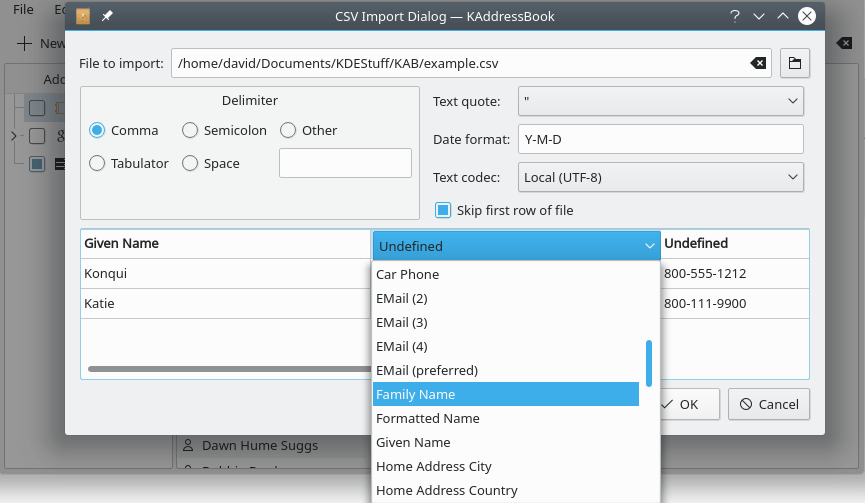
KAddressBook's “Import CSV File” dialog after choosing the → → function, selecting the file to be imported, and beginning to define the fields to be imported.
If you wish the contents of the current column to be imported, choose a destination from the list of field names appearing beneath the blue “Undefined” box. See the next section for a list of the pre-defined fields. Use the horizontal scrollbar near the bottom of the dialog to view all the columns in the input file. When your selections are complete, click the button. If you have defined multiple address books, you will be asked to specify which address book is to be used. KAddressBook will then import the selected data as new contacts.
If you intend to import additional datasets in the same format sometime in the future, you may click the button (cf. the first illustration in this section) to save the selections you have made. You will be prompted to give the template a name. Later, when you import another file with the same layout, you can save time by clicking the button.
Click here to return to the Table of Contents for this Appendix.