Protecting the document means that without the password a user cannot add or delete sheets. Document protection does not protect cells.
Select → A dialog appears asking you for a password. The Password: strength meter indicates if your password is secure enough. The longer the indicator is, the more secure your password.
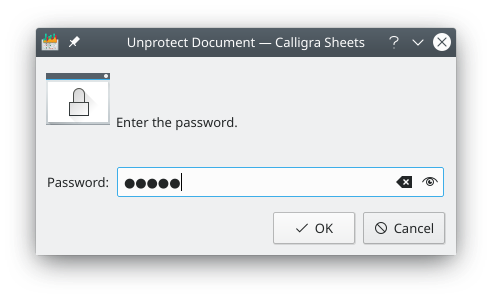
That password will then be required to unprotect the document.
When a document is protected, you may not:
Rename a sheet
Insert a sheet
Remove a sheet
Hide a sheet
Show a sheet
See the sheet properties
Merge or dissociate cells
Protecting a sheet means protecting the contents of all protected cells and objects on a sheet. Individual cells or a selection of cells can be unprotected within a protected sheet, see next section.
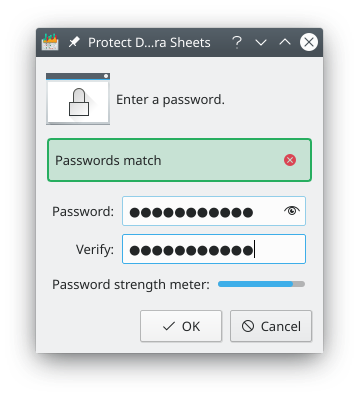
To protect a sheet, select → . A dialog appears asking you for a password. The Password strength meter indicates if your password is secure enough. The longer the indicator is, the more secure will be your password.
That password will then be required to unprotect the sheet.
When a sheet is protected, you may not:
Insert any object or chart
Format any cell
Insert a row or a column
Edit and change cell content
Change any content in the sheet
Note
Protecting a sheet is especially useful for preventing accidental erasure of formulae.
Warning
Cell protection is active for all cells by default and is effective when you enable sheet protection. So if you keep the default and if you protect the sheet, all cells will be protected.
If you want only certain cells to be protected, this default protection must be turned off for all other cells. For example you might want most cells to accept user input so you will uncheck Protected for those and choose to keep protected cells that should stay unchanged (such as titles). So you need 3 steps in order to protect only some cells: unprotect all the cells, select the cells to protect and protect them and then protect the whole sheet.
To unprotect all the cells:
Select the entire spreadsheet with the mouse.
In the menubar, select → .
In the dialog that appears, go to the Cell Protection tab.
Check Hide all and uncheck Protected to remove the protection on all cells. The cells are now all unprotected.
To protect a range of selected cells or a selection of non-contiguous cells:
Highlight the range of cells that are to be protected or use the Ctrl key to select non-contiguous cells.
When all of the desired cells are selected, go to the → menu.
In the dialog that appears, go to the Cell Protection tab.
Click on the box next to Protected then click on .
Once the cells are marked for protection, the protection option must be enabled at the sheet level, that means you must protect the entire sheet for the cell to be effectively protected:
Select → .
In the dialog that appears, provide a safe password, then confirm it by typing it again. Click on .
Protected cells in a protected sheet cannot be edited without unprotecting the whole sheet, and any sheet changes are disabled. For example, no one can insert rows or columns, change column width, or create embedded charts.
You might want to hide your formulae so other people cannot see them. By default, every cell is protected and not hidden. But it is important to remember that these attributes have no effect unless the sheet itself is protected.
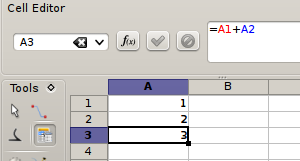
To hide cell formulae, select the appropriate cell or range of cells or non-contiguous cells with Ctrl and then choose the → menu. In the Cell format dialog, click the Cell Protection tab and select Hide formula. After you protect the sheet, the results of the formulae will be visible, but the formulae will not.
You have now to protect the sheet: choose → to display the Protect Sheet dialog box. Enter a safe password twice to prevent others from unprotecting the sheet.
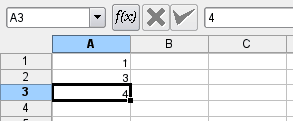
When Hide formula is enabled and Protected is disabled, the formula is hidden after protecting the sheet but the cell content can be changed.
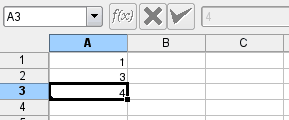
When Hide formula and Protected are enabled, the formula is hidden after protecting the sheet and the cell content cannot be changed.
Keep in mind that it is very easy to break the password for a protected sheet so if you are looking for real security, this is not the best solution.
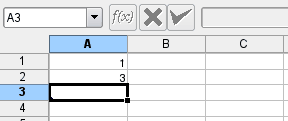
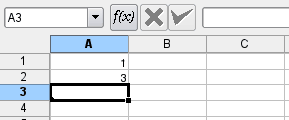
You can hide both the formula and the content of the cell by choosing Hide all in the Cell Protection tab in the → menu. In the screenshot below, the cell itself is not protected (Protected is unchecked) thus the cell content can be changed.
Here the cell itself is protected so it cannot be overwritten.