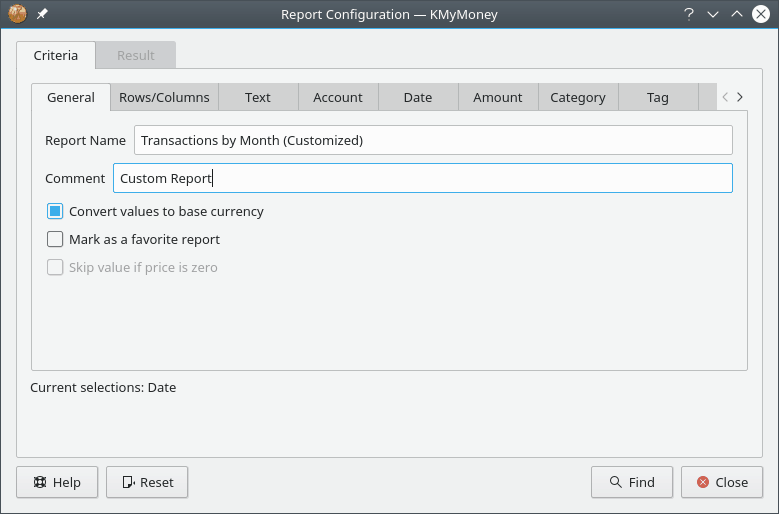
You can configure the default reports or create your own from them by selecting 'New' and then configuring the new report. When you select 'Configure' you will be presented with the Report Configuration Dialog, with the Report Tab selected. Initially, the new report is named the same as the old report with “(Customized)” added to the end. You can change the name to whatever you want. You can even name your custom reports the same as a default report, or the same as another custom report. Also, you can always use the Comment field to further distinguish reports.
The Report Configuration dialog has a number of tabs across the top, with subtabs below them. Each tab displays options for configuring different aspects of the report.
The configuration dialog for reports which display amounts over time may include budget related settings. These are only enabled if you do have one or more budgets defined, and include a drop-down to select one of those budgets. If one is selected, the report will show the budgeted amount per time period rather that the actual amounts from transaction in that period. In addition, some reports may also give you the option of displaying both the bugdeted and actual amounts, so you can compare them.

Note that this screenshot shows the old names of the Criteria and Result Tabs, which have been changed to Report and Filters. Different reports will show different subsets of the subtabs, appropriate for configuring that particular report. In addition, many of the subtabs have been moved from from the Report Tab to the Filters Tab.
Here you set the basic properties of this report.
Report Name: Choose a name for this report.
Comment: Enter a comment to help you remember the details of this report, or to distinguish reports with the same name.
Convert values to base currency: Select this option to convert all values in the report to your base currency. Leave it unchecked to see values in their original currency. If currencies are not converted, then subtotals will not be shown.
Mark as favorite report: Check this to cause this report to show up on the home page and in the group of Favorite Reports.
Skip value if price is zero: This is only enabled for investments reports which show prices instead of balances. Select this option to include prices only if there is an actual price for the date. If not, 0 will be shown. In the graph, the value will be skipped.
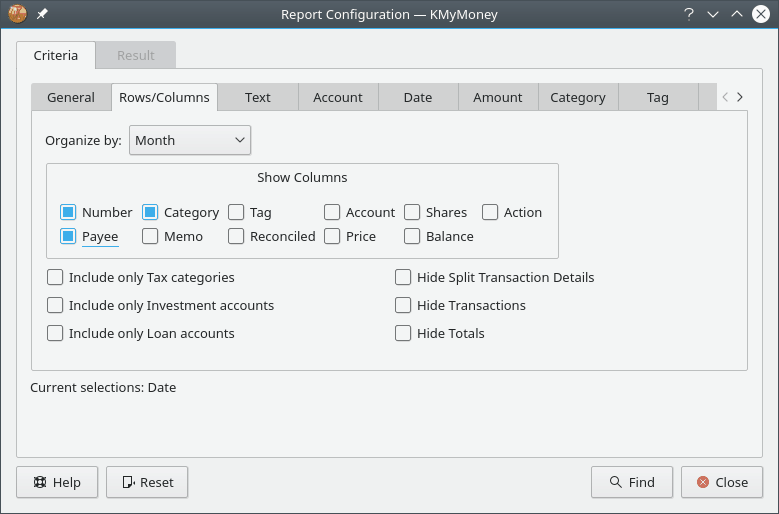
This is where you configure the selection and organization of the rows and columns shown in the report. This tab presents different configuration options depending on the type of report you have selected.

For Income and Expenses and for Net Worth reports:
Budget: see discussion above
Show totals column: Check this to display a column showing the total for each row.
Show totals row: Check this to display a row showing the total for each column.
Rows: Choose what kind of accounts to display as the rows of this report
Detail: Choose the level of detail required for this report. The following levels of detail are available:
All: Show every category or account.
Top-Level: Show only the highest-level categories or accounts, and roll up the sums of the subordinate categories or accounts into those values.
Groups: Show only the totals of the categories or accounts.
Totals: Show only the grand totals row.
Average days: Only enabled for relevant reports. Set how long of a time period each column should encompass.
Columns: Choose how large of a time period each column should encompass
Include scheduled transactions: Check this to include scheduled transactions that have not yet been entered.
Include transfers: Unless you check this, transfers are excluded from transaction reports.
Include unused accounts/categories: Unless you check this, rows which would have zero values are not displayed.
For Transactions reports:
Organize by: Choose how to group the transactions in this report.
Show Columns: Choose which transaction details should be shown in the report. The date and transaction amount are always shown.
Include only Tax categories: Only show categories which have been marked as tax-related.
Include only Investment accounts: Only show transactions from investment accounts.
Include only Loan accounts: Only show transactions from Loan accounts.
Include transfers: Unless you check this, transfers are excluded from transaction reports.
Hide Split Transaction Details: Do not display the detailed splits, just the overall account details.
Hide Transactions: Do not display the transactions, leaving only the totals displayed.
Hide Totals: Only display the transactions, not the totals.
This tab allows you to configure what the report looks like when it is displayed as a chart. See the Graphs & Charts section for more explanation of the charting functions.
Chart Type: The visual format of chart desired.
Chart Palette: Select from several possible color palettes for the chart.
Show grid lines: Whether to display horizontal and vertical grid lines on the chart for line, bar, and stacked bar charts; circular and saggital grid lines for pie and ring charts.
Draw values on chart: Whether to print the data values on the chart for chosen data points.
Show chart by default: Whether this report should first be displayed as a chart when it's opened instead of as a tabular report.
Logarithmic vertical axis: Only enabled when relevant - use a logarithmic instead of linear scale for the vertical axis.
Plot expenses downward: If not checked, then both income and expenses are plotted upwards.
Line width: The width of data lines on the chart.
Use this section to specify the date range of transactions to be included in the report. The Range drop-down includes a large number of predefined ranges, but you can select “User defined” and manually set From and To. The Ticks drop-down specifies the placement of tick marks on the horizontal (time) axis of the chart.
The subtabs here are the same as the tabs in the Search Transactions interface. Please refer to the documentation on that interface for details on their use.