The Task Editor is used to create, edit, and delete tasks.
Tasks can be organized into a hierarchical tree structure to any depth.
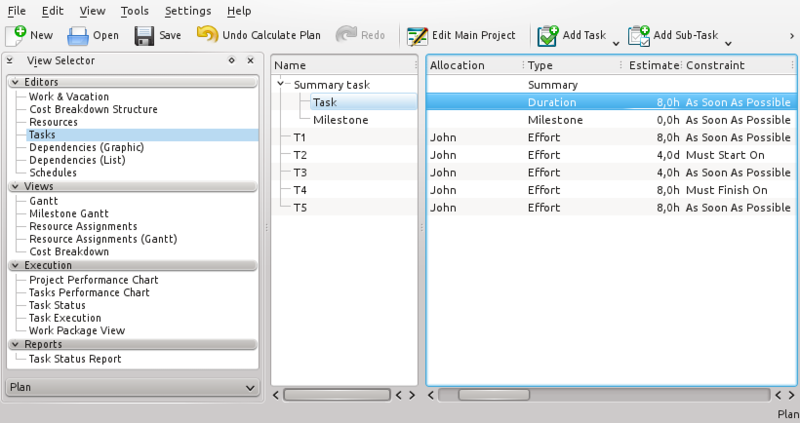
The toolbar provides the means to create, delete and move tasks and milestones:
| Button | Shortcut | Description |
|---|---|---|
|
Add Task |
Ctrl+I |
Dropdown box to create a task or milestone. The new item is positioned after the currently selected item on the same level as the selected item. If no item is selected, the new item is appended at the top level. |
|
Ctrl+Alt+I | |
|
Add Sub-task |
Ctrl+Shift+I |
Dropdown box to create a sub-task or -milestone. The new item is appended as a child to the currently selected item. |
|
Ctrl+Shift+Alt+I | |
|
Delete Task |
Delete |
Deletes the selected tasks. |
|
Indent Task |
Appends the selected task as a child to the task above. | |
|
Unindent Task |
Moves the selected task one level up, inserting it after its current parent task. | |
|
Move Up |
Moves the selected task up one place. | |
|
Move Down |
Moves the selected task down one place. |
Note that you can also move or copy tasks using drag and drop or copy/paste.
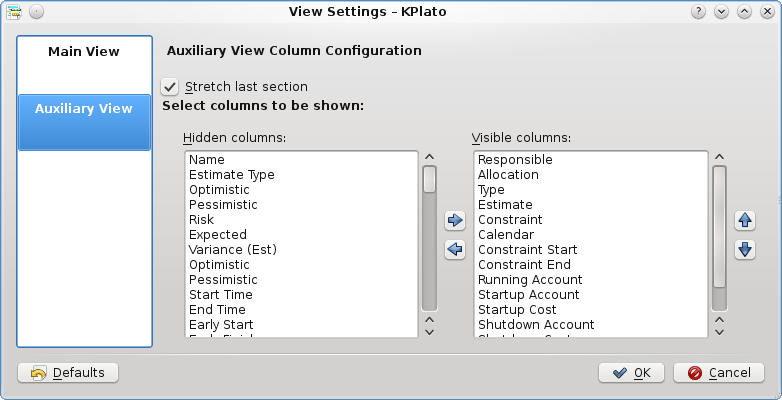
Data can be edited inline as described here or by using the Task Settings Dialog.
The following columns are displayed as default:
| Column | Description |
|---|---|
|
Name |
The name of the task. |
|
Status |
Task status |
|
Responsible |
The person responsible for this task. |
|
Allocation |
List of resource allocations. |
|
Type |
The type of task or the estimate type of the task. The type can be set to Milestone, Effort or Duration. Note: If the type is Summary or Project the type is not editable. |
|
Calendar |
The calendar used when estimate type is Duration. |
|
Estimate |
The most likely estimate. The estimate is the expected amount of effort or time needed to complete a task. It can be expressed in different units: h (hours), d (days), w (weeks) and M (months). |
|
Optimistic Ratio |
Optimistic estimate expressed as a negative percentage of the most likely estimate. (E.g. -20%). This is only used if a PERT distribution is used. |
|
Pessimistic Ratio |
Pessimistic estimate expressed as a positive percentage of the most likely estimate. (E.g. 50%). This is only used if a PERT distribution is used. |
|
Risk |
Risk controls the PERT distribution used when calculating the actual estimate for this task. |
|
Constraint |
The timing constraint type. |
|
Constraint Start |
Constraint start time. |
|
Constraint End |
Constraint end time. |
|
Running Account |
Account for running costs. |
|
Startup Account |
Account for cost incurred at startup of the task. |
|
Startup Cost |
The cost incurred at startup of the task. |
|
Shutdown Account |
Account for cost incurred at shutdown of the task. |
|
Shutdown Cost |
The cost incurred at shutdown of the task. |
|
Description |
Task notes. |
Task Modules are groups of tasks that can be reused across projects.
This makes it possible to draw on past experience and to standardize similar operations.
A task module is inserted into your project by dragging it from the docker and dropping it into your project.
A task module is a regular plan file, and is designed using Plan in the same way as designing a regular project.
A task module, however, typically includes only tasks, estimates, and dependencies.
The project name is displayed in the docker, and the description is used as the tooltip.
A module can be opened for inspection or editing by double-clicking on the module.
The modules can be grouped by storing them in different directories. Where to search for them is configured using the Project Settings Dialog.
Default values for new projects can be defined using the Plan Configuration Dialog.
The Resources Docker offers a simple way to allocate resources to tasks by selecting the resources you need and dragging them onto the Allocation column.
A resource can also be dropped on the Responsible column.
The Allocations Docker displays the current resource allocation for the selected task.