Okular allows you to review and annotate your documents.
Okular has two different kind of annotations:
Text annotations like Yellow Highlighter and Black Underlining for files with text like e.g. PDF.
Graphic annotations like Pop-up Note, Inline Note, Freehand Line, Highlighter, Straight Line, Polygon, Stamp, Underline, Ellipse, and Typewriter for all formats supported by Okular.
Using the context menu either in the Annotations view of the sidebar or in the main window you can open a Pop up Note for any kind of annotation and add or edit comments.
Annotations are not only limited to PDF files, they can be used for any format Okular supports.
Okular has the "document archiving" feature. This is an Okular-specific format for carrying the document plus various metadata related to it (currently only annotations). You can save a "document archive" from the open document by choosing → and selecting Okular document archive in the Filter selector. Documents saved this way will get .okular as their filename extension. To open an Okular document archive, just open it with Okular as it would be e.g. a PDF document.
You can also save annotations directly into PDF files. You can use → to save it over the current file or → to save it to a new file.
Note
Due to DRM limitations (typically with PDF documents), adding, editing some properties or removing annotations could not be possible.
Note
Any action on annotations (creation and removal of annotations, editing arbitrary annotation properties, relocating annotations with Ctrl+drag, and editing the text contents of an annotation) can be undone or redone using the corresponding item from the menu. It is also possible to undo the action by pressing Ctrl+Z and redo the undone action by pressing Ctrl+Shift+Z.
You can configure the default properties and appearance of each annotating tool. Please refer to the corresponding section in this documentation.
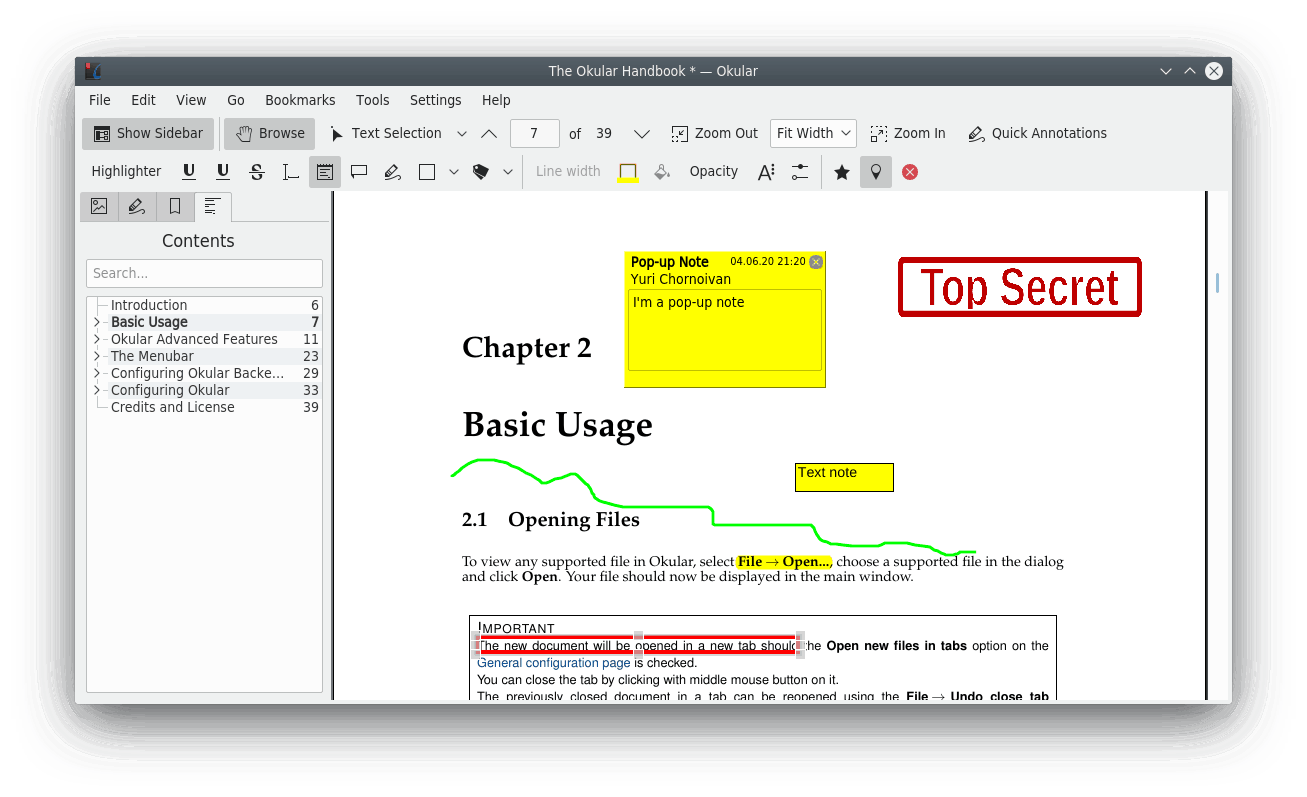
To add some annotations to the document, you have to use Quick Annotations button on the main Okular toolbar or activate the annotating toolbar. This is done by either selecting → or pressing F6. Once the annotating toolbar is shown, just press one of its buttons or use keyboard shortcuts (keys from 1 to 9) to start constructing that annotation.
The annotating toolbar helps you to make annotations with drawings, shapes, and text messages. You can use the annotating toolbar to mark up a document (e.g. add lines, ellipses, polygons, stamps, highlights, underlines etc.). The table below describes exactly what the default set of annotating toolbar buttons does.
| Button | Tool Name | Description |
|---|---|---|
|
|
Highlighter |
To highlight text in the document with some given background color. Click on the tool button, then click with the mouse button and hold to place the beginning of the highlighted text snippet, then drag to highlight it. It is possible to define the Type (, , or ), Color, and Opacity for the highlighter. Just right-click on the highlighted text and select the menu item. |
|
|
Underline |
To underline some text. Click on the tool button, then click with the mouse button and hold to place the beginning of the underlined text snippet, then drag to underline it. It is possible to define the Type (, , or ), Color, and Opacity for the underline. Just right-click on the underlined text and select the menu item. |
|
|
Squiggle |
To underline some text by a squiggle line. Click on the tool button, then click with the mouse button and hold to place the beginning of the underlined text snippet, then drag to underline it. It is possible to define the Type (, , or ), Color, and Opacity for the underline. Just right-click on the underlined text and select the menu item. |
|
|
Strike Out |
To strike out some text. Click on the tool button, then click with the mouse button and hold to place the beginning of the underlined text snippet, then drag to underline it. It is possible to define the Type (, , or ), Color, and Opacity for the underline. Just right-click on the underlined text and select the menu item. |
|
|
Typewriter |
Typewriter features opaque letters on transparent background, so that it is useful to fill noninteractive forms. Click on the tool button, then click with the mouse button and hold to place the top-left corner of the note, then drag to place the bottom-right one. Enter the text of the note then click on the to save the note, to cancel note entering or to clear the note. It is possible to define the Font and Text color for the text. Just right-click on the typewriter text created and select the menu item. |
|
|
Inline Note |
To draw inline note. The note will be shown inline as is. Click on the tool button, then click with the mouse button and hold to place the top-left corner of the note, then drag to place the bottom-right one. Enter the text of the note then click on the to save the note, to cancel note entering or to clear the note. It is possible to define the Color, Opacity, Font, Align, and Border width for the note. Just right-click on the note icon created and select the menu item. |
|
|
Pop-up Note |
To draw multiline note. The note will can be viewed by double clicking on an icon in the document. Click on the tool button, then click on the place in the document where the pop-up note should be added. Enter the text of pop-up note then click on the Close this note button in the top right corner of the pop-up window. It is possible to define the Color, Opacity, and Icon for the note. Just right-click on the note icon created and select the menu item. |
|
|
Freehand Line |
To draw free-form lines. Click on the tool button, then click with the mouse button and hold to place the start of the line, then drag to draw the line. It is possible to define the Color, Opacity, and Width for the line. Just right-click on the line created and select the menu item. |
|
|
Arrow (drop-down list) |
To mark with an arrow. Click on the tool button, then click with the mouse button to place the starting point of the line, then drag to place of the ending point of the line should be and click once more. It is possible to define the Color, Opacity, Width, Line start, Line end, Leader line length, and Leader line extension length for the line. Just right-click on the line created and select the menu item. |
|
|
Straight line (drop-down list) |
To mark with a line. Click on the tool button, then click with the mouse button to place the starting point of the line, then drag to place of the ending point of the line should be and click once more. It is possible to define the Color, Opacity, Width, Line start, Line end, Leader line length, and Leader line extension length for the line. Just right-click on the line created and select the menu item. |
|
|
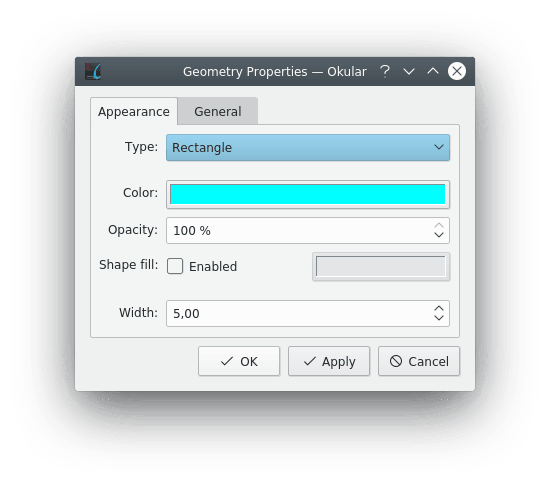
Rectangle (drop-down list) |
To draw a rectangle around some chosen area. Click on the tool button, then click with the mouse button and hold to place the top-left corner of the rectangle, then drag to place the bottom-right one. It is possible to define the Type ( or ), Color, Opacity, Shape fill (and its color), and Width for the border. Just right-click on the border created and select the menu item. |
|
|
Ellipse (drop-down list) |
To draw an ellipse or rectangle around some chosen area. Click on the tool button, then click with the mouse button and hold to place the top-left corner of the circumscribed rectangular for the ellipse, then drag to place the bottom-right one. It is possible to define the Type ( or ), Color, Opacity, Shape fill (and its color), and Width for the border. Just right-click on the border created and select the menu item. |
|
|
Polygon (drop-down list) |
To draw a closed plane figure from three or more segments. The corresponding note can be viewed by double clicking inside the polygon. Click on the tool button, then click with the mouse button to place the first vertex of the polygon, then drag to place of the second vertex. Proceed until you draw the whole polygon up to the first vertex. Click twice if you want to add some note to the polygon. Enter the text of the note then click on the to save the note, to cancel note entering or to clear the note. It is possible to define the Color, Opacity, Shape fill (and its color), and Width for the polygon. Just right-click on the polygon created and select the menu item. |
|
|
Stamp |
To mark the text or image with some predefined shape. Click on the tool button to choose the stamp from the drop-down list then click with the mouse button to place the stamp. A single click just places a square stamp (useful for icons). To add a rectangular stamp you can click with the mouse button and hold to place the top-left point, then drag to place the bottom-right one. It is possible to define the Opacity and Stamp symbol for the stamp. Just right-click on the stamp icon created and select the menu item. WarningThis feature is experimental. Custom stamps inserted in PDF documents are not visible in PDF readers other than Okular. |


These are the default annotations provided by Okular. Using the Annotations page of the configuration dialog you can add your own annotations like custom stamps, text markup or a geometrical shape with inner color to highlight regions etc.
Note
It is possible to add LATEX code into the text of annotations. Please add $$ to the text of annotation, where code$$code is any valid LATEX equation, and follow instructions on the screen to make it render by a LATEX distribution installed in your system.
It is possible to configure the current tool options using the annotating toolbar itself. The table below describes exactly what the default set of annotating toolbar configuring buttons does.
| Button | Option Name | Description |
|---|---|---|
|
|
Line width |
Click on the tool button to choose the width from the drop-down list. |
|
|
Annotation color |
Click on the tool button to choose color of text or border of your annotation. You can chose one of the predefined colors or click on the item to open the color selection dialog. |
|
|
Annotation fill color |
Click on the tool button to choose a fill color of your annotation. You can chose one of the predefined colors or click on the item to open the color selection dialog. |
|
|
Annotation opacity |
Click on the tool button to choose annotation level of opacity from the drop-down list ( is for the opaque annotations). |
|
|
Annotation font |
Click on the tool button to open the font selection dialog. |
|
|
Advanced settings for the current annotation tool |
Click on the tool button to open the general configuration dialog for your annotation. |


There are three additional utility buttons on the default annotating toolbar.
| Button | Description |
|---|---|
|
|
Add the current annotation to the Quick Annotations menu on the main toolbar. NoteYou can use the default shortcuts from Alt+9 to Alt+0 to select the quick annotation actions any time you like even with the annotating toolbar hidden. |
|
|
When checked keep the current annotation tool active after use. |
|
|
Hide the annotating toolbar. |


By pressing Shift you can constrain the angle of line and polygon annotations to 15° steps, and the ratio of shape annotations (e.g. Rectangle, Ellipse) to 1:1. You can also get a toolbar button from Configure Toolbars....
The contents of the Quick Annotations menu can be configured using the Annotations page of Okular configuration dialog. This page can be opened by clicking Quick Annotations button, then choosing from the pop-up menu.
Note
Activating the annotating toolbar will make you switch to the Browse Mode.
You can stop the construction any time by pressing again on the button of the annotation you are constructing, or by pressing the Esc key.
The newly constructed annotation will have as author the author you set in the Annotations page in Okulars configuration dialog. The Annotations page can also be used to configure the content of the annotating toolbar.
To remove an annotation, just click on it with the mouse button, and select or select an annotation using the mouse button and press the Del key.
When removing the annotation, its window will be closed if open.
Note
This option could not be enabled because the document does not allow removing annotations.
To edit an annotation, click on it with the mouse button and select . A dialog will appear with the general annotation settings (like color and opacity, author, etc.) and the settings specific to that annotation type.
To move an annotation, hold down the Ctrl key, move the mouse pointer on it and then start dragging with the mouse button.
If you click with the mouse button on an annotation, it gets selected. Resize handles appear on the selection rectangle. When the cursor is moved over one of the 8 resize handles on the corners or edges, the cursor shape changes to indicate the resize mode. Click anywhere else on the annotation to move it. Pressing Esc or clicking an area outside the annotation cancels a selection.
Resizing is only applicable for annotation types Inline Note, Typewriter, Stamp and Ellipse.
Note
Depending on the document permissions (typically with PDF documents), some options can be disabled.