Table of Contents
The Skrooge window is composed of a main area, surrounded by docks, and a status bar. Docks can be closed and reopened, and positioned left or right of the main area.
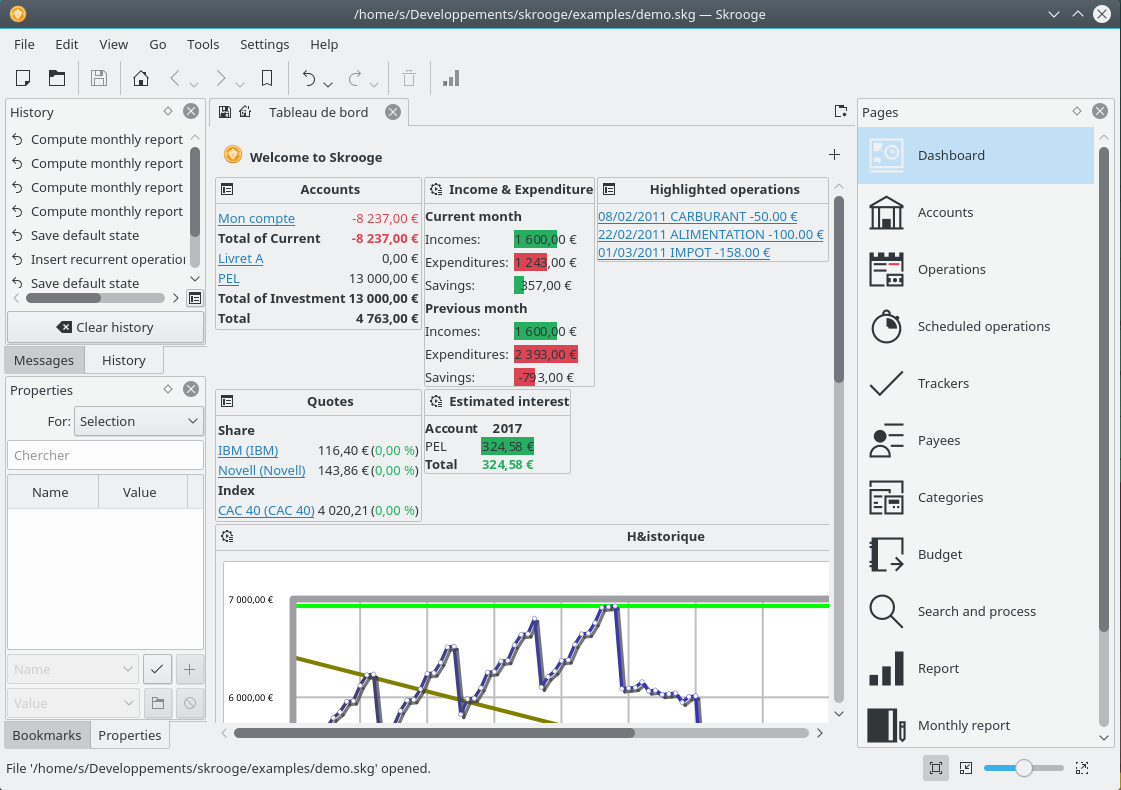
This is where Skrooge will display the information you are interested in. It can contain many tabs, each one with the view you assigned to it.
Docks can be found in many KDE applications. They are a subpart of an application window, and can be relocated, stacked, closed, or even detached from the main window.
Some examples of docks layout:
|
|
|
Skrooge docks are:
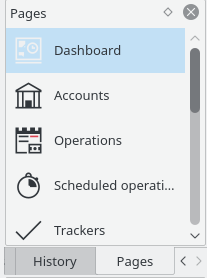
The page chooser is a dock where you can select the view to be displayed, either in the current tab or in a new tab. To open in a new tab, hold the Ctrl key while clicking on the selected view.
Tip
You can customize this list by using the contextual menu on this list.
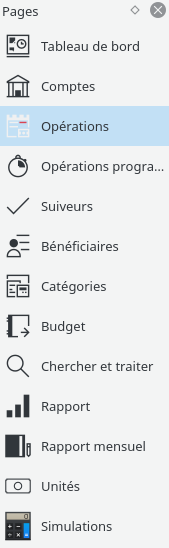
Each context will be described in a specific chapter in this handbook.
Consider a situation where you need to customize the transactions view on a "per-account" basis. Each account would be displayed in its own tab, maybe with different columns in each table. The aforementioned method will not work, as it applies on all tabs with the same type.
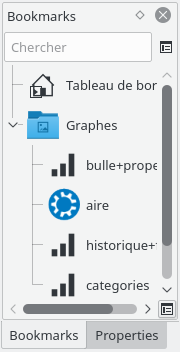
The solution here is to save each individual tab as a Bookmark. Much like in a web browser, bookmarks can be organized in a hierarchy of bookmark folders that you can visualize in the Bookmark Browser, as shown below:
To create a bookmark, select a page from the page chooser you want to bookmark, and customize its content to your liking. When finished, in the Bookmarks dock, bring up the contextual menu, and select .
Each bookmark or bookmark folder can be "autostarted", i.e. it will be automatically opened when starting Skrooge in the order of the bookmarks. This way, you can fully customize the default Skrooge layout.
You can select the text and icon you want for each bookmark or bookmark folder.
Skrooge manages undo/redo in a rather classic fashion, except that you can undo or redo any action, even if it was made several days ago. As per default settings, the history is not cleared upon closing Skrooge (you can change this behaviour in the settings), which means you could undo virtually everything up to the document creation.
In order to limit the impact on filesize, Skrooge is configured by default to keep a history of 50 entries. You can change this value in the settings.
Skrooge has a dock that lists all undoable actions.
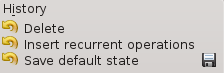
The history browser shows three columns:
an icon showing the state of the action. A yellow counter clockwise arrow
 means the action is undoable. A green clockwise icon
  means the action is redoable.
the description of the action
the date when the action was made
a disk icon
 means this action corresponds to a saved state, i.e. the document was saved right after this action.
To undo an undoable transaction, or redo a redoable transaction, double click on it.
One of the uncommon features of Skrooge is the ability to add custom properties to any object. For example, you may want to add the name and phone number of a bank employee to an account, because they are your contact. Another example is attaching a file to a transaction, like an invoice scan.
This can be achieved using the property editor, which is a dock of its own.
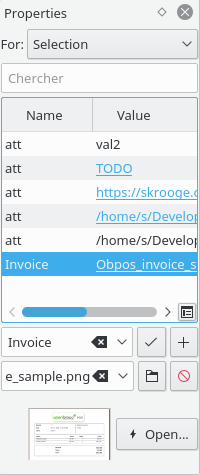
When this dock is visible, it will display the custom properties of the selected object (For: Selection) or of all objects (For: All), whether it is an account, a transaction, category, unit, etc. This dock allows the user to create, update or delete properties.
A property can be:
A simple string
A copied file regardless of format (.odt, .png, .pdf, …). This means that the file is copied into the Skrooge document. This file can be opened from Skrooge by clicking the appropriate button. Take care, as all modifications of the original file are not replicated in the version saved in Skrooge document.
A link to an existing file whatever the format (odt, png, pdf, …). It means that the file is not copied into the Skrooge document but just linked. This file can be opened from Skrooge by clicking on the appropriate button.
A link to an http page, for example, the website of your bank.
Added properties can be displayed as a column on tables.
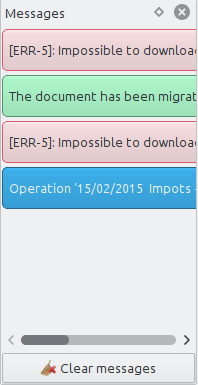
This dock allows you to see all messages displayed.
Each context will be described in a specific chapter in this handbook.
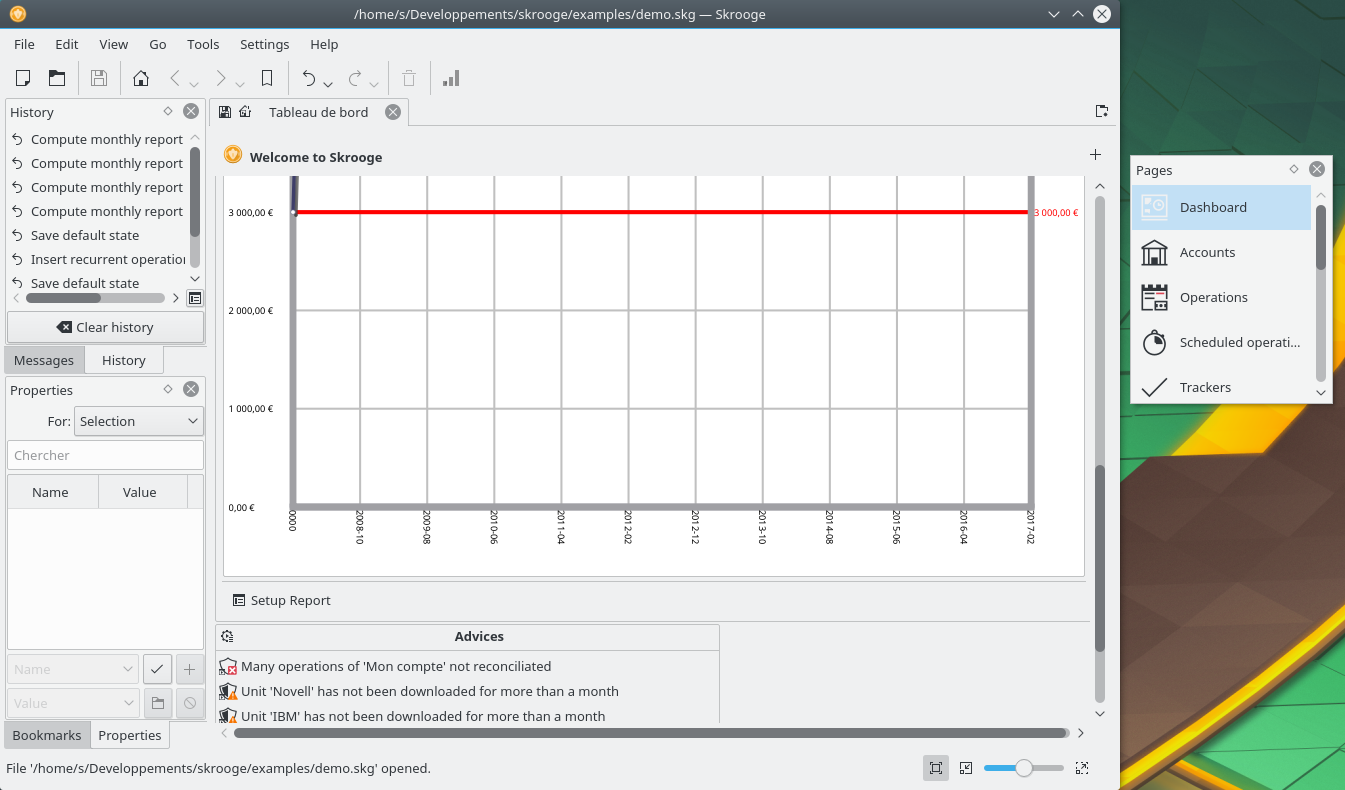
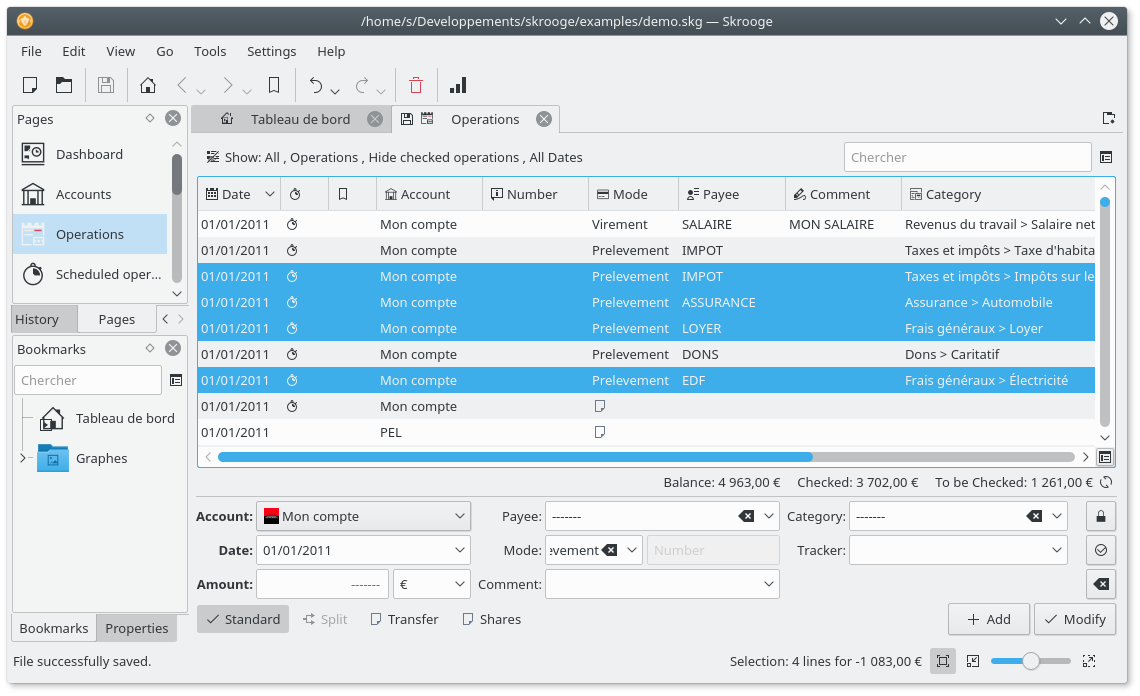
Skrooge can display several tabs. You can add as many tabs as you want, each one containing the information you need. The above screenshot shows 4 tabs (accounts, transactions, and two graphs).
In most Skrooge views, you edit items in an editing panel located at the bottom of the page.

When a view has more than one editing mode, buttons let you choose between them. In the above screenshot, there are four buttons to choose different editing modes for Transactions: "Standard", "Split", "Transfer" and "Shares". In order to preserve maximum space for visualizing information, especially on small screens, you can hide or show some views' editing panel. In the above screenshot, if you click the button for the current mode to deselect it, the editing panel becomes hidden.
In editing panels, all numerical fields are interpreted. This means that you can enter mathematical expressions such as:
5*3+10
5*(3+10)
Math.sin(10)
In Skrooge, all tables are customizable. Bring up the table's context menu, by right-clicking on the column header or clicking the settings icon in the table header - you will see a menu appear, as described in more detail below:
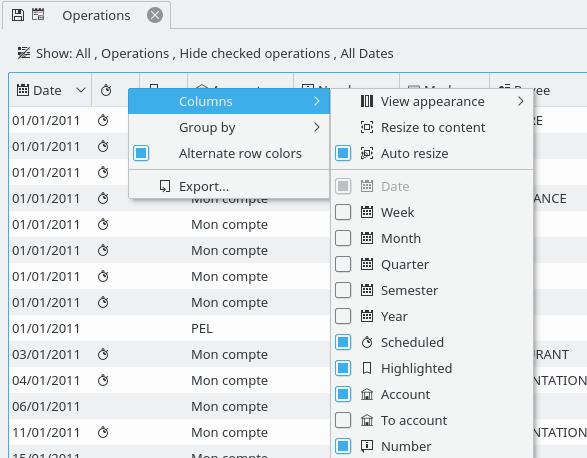
Customize the columns appearance.
Use a predefined set of columns. The "default" column usually shows all columns. Other predefined sets may exist on a "per-table" basis.
Resize all columns to fit the content.
When activated, you will not be able to manually resize columns. Skrooge will do it automatically based on the columns content.
Shows the list of all columns that can be displayed for this table. The ones currently displayed are ticked. Untick to hide a column, tick to show. The added properties can be selected to be displayed as a column.
Choose how to group the lines.
No grouping.
The lines will be grouped by the column where the sort is applied.
Shows the list of all columns that can be used for grouping.
Alternate the colors used for each row. The colors used are based on the chosen KDE color scheme.
Export the table as a stand-alone file. Supported formats are .pdf, .csv, .html, .SVG, .odt or .txt.
You may also click on a header to choose the sorting column, or reorder columns by dragging them left or right.
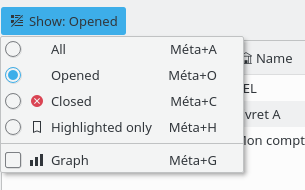
In all Skrooge views, you will find a "Show" drop down menu allowing you to limit what the table displays.

In all Skrooge views, you will find a search field that filters the table to only display lines matching what you type:
In an transactions view, it will filter the transactions containing the text entered, whatever the column (date, payee, category, comment, etc.)
In an accounts view, it will filter the accounts containing the text entered, whatever the column (bank, account name, number, etc.)
In a report view, it will redraw the graph based on this filter
In a… well, you get the idea, right?
Tip
The filtering string follows these rules:
Searching is not case-sensitive. So table, Table and TABLE are all the same.
If you enter a word or series of words in the search box, the application will filter the table to only display lines having these words (logical operator AND).
If you want to add (logical operator OR) some lines, you must prefix your word with "+".
If you want to remove (logical operator NOT) some lines, you must prefix your word with "-".
If you want to search only one column, you must prefix your word with the column name, like: col1:word.
If you want to use the character ":" in value, you must specify the column name, like: col1:value:rest.
If you want to search for a phrase or something that contains spaces, you must put it in quotes, like: "yes, this is a phrase".
You can also use operator "<" and ">".
Below are some examples that can illustrate these rules in a more intuitive way:
+val1 +val2 => Keep lines containing val1 OR val2
+val1 -val2 => Keep lines containing val1 but NOT val2
"abc def" => Keep lines containing the sentence "abc def"
"-att:abc def" => Remove lines having a column name starting by att and containing "abc def"
abc:def => Keep lines having a column name starting by abc and containing def
:abc:def => Keep lines containing "abc:def"
Date>2015-03-01 => Keep lines where Date attribute is greater than 2015-03-01
Amount<10 =>Keep lines where Amount attribute is less than 10
As explained in the previous chapter, tables can be totally customized to your liking. You probably do not want to lost all the customization work you made when you close a tab. For this reason, two ways are included to save this work.
This option allows you to save the current tab state as the default state that will always be called when opening this page. For example, you may want your Dashboard to contain 4 widgets, organized to your liking - what's even more important is that you always want the Dashboard to look the same, you do not want to repeat the customization work every time you open it.
To do this, you simply need to do the customization work once, then save the tab state as the Default State for the page being displayed. Setting the default state is done by right clicking on the tab and selecting . If you want to keep more than one state for a page then you must use bookmarks.
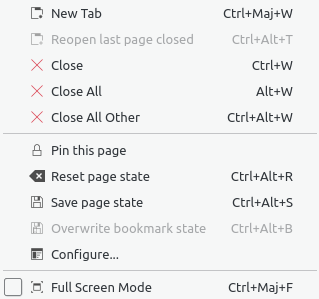
A faster way is to click on the disk icon that appears on the left of the tab title whenever you modify the default state in a tab.
In Skrooge, it is possible to update a large selection of items. Though mostly useful for transactions, it can also be used on accounts, units, scheduled transactions, etc.
The way to do this is quite straightforward. First, select items to be updated, set the attribute value(s) that should be applied on all items, and click on . All attributes where you didn't set a value, will be left untouched on the items.
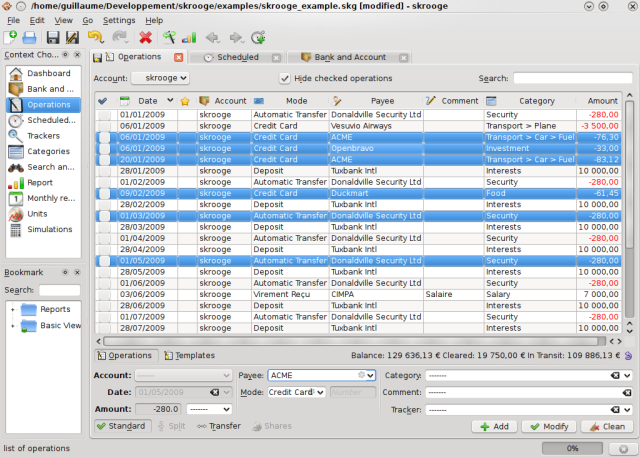
Set mode as "Credit Card" and payee as "ACME" on selected transactions.
Updated transactions.
Note
It is intentionally impossible to set date or quantity with a mass update