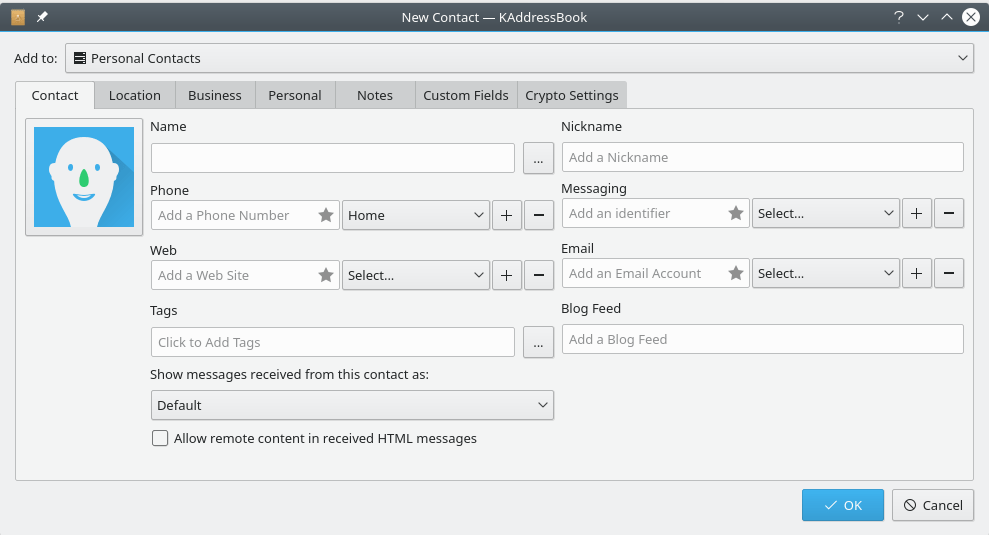
Open KAddressBook's New Contact dialog by clicking the button on the Toolbar. A dialog box will appear.
As you can see from the preceding screenshot, the “New Contact” dialog allows one to enter several different data items. Additional data may be entered via the “Location”, “Business”, “Personal”, “Notes”, “Custom Fields”, and “Crypto Settings” sub-dialogs, as explained more fully in chapter 4, below. For now, let's concentrate on adding the “Contact” data items appearing in the preceding illustration.
If you have created more than one address book, use the drop-down list labeled “Add to:” to select the data set to which the new contact will be added. Then enter the new contact's name in the input field marked “Name”, and key in his or her email address in the input field labeled “Email”. If you want to specify special formatting options for this contact's name data, click the button to the right of the “Name” input field and follow the prompts. If you wish to add more email addresses for this person, click the button to the right of the “Email” input field and another Email input field will be generated. To delete an Email address, click the associated button.
You may also associate a nickname, one or more telephone numbers, multiple instant messaging services, and several web sites with each contact in an address book, as explained in chapter 4. You may also use the “Show messages ...” and “Allow remote content ...” options to fine-tune the way KMail handles email you receive from each contact. See chapter 3 for a more complete explanation.