Table of Contents
You can easily create your own training course using the built-in
Typewriting Trainer course and keyboard layout editor. Press ![]() button at the right of the home screen
toolbar then choose . You can choose open a course file or create an empty
course from
scratch or using an existing course as a template.
button at the right of the home screen
toolbar then choose . You can choose open a course file or create an empty
course from
scratch or using an existing course as a template.
Important
You cannot edit the built-in courses, even if you have the write access to the installation folder.

The course properties can be chosen using Typewriting Trainer course creation wizard. To
invoke this wizard you should press ![]() button in the toolbar of Course
and Keyboard Layout Editor window.
button in the toolbar of Course
and Keyboard Layout Editor window.
The first page of creation Typewriting Trainer wizard allows you to choose the type of the data. Select Course and press .

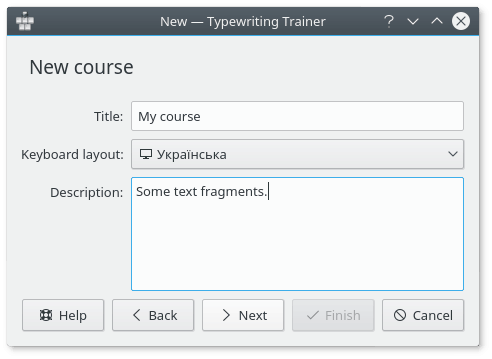
The second page of wizard allows you to choose the title, the keyboard layout and the description of the course.

The course title is important for the quick-select menu entry in the course list and for the statistics.
The description should be used to include information
about the lesson author and source of lesson data if any. This description can
be shown by pressing ![]() button in the home screen of
Typewriting Trainer.
button in the home screen of
Typewriting Trainer.
When you finished with entering appropriate values press .

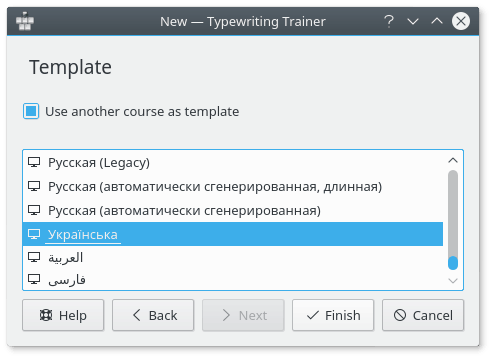
Using the third page of wizard you can choose an other course as a template for your course. Select the course from the list and press .

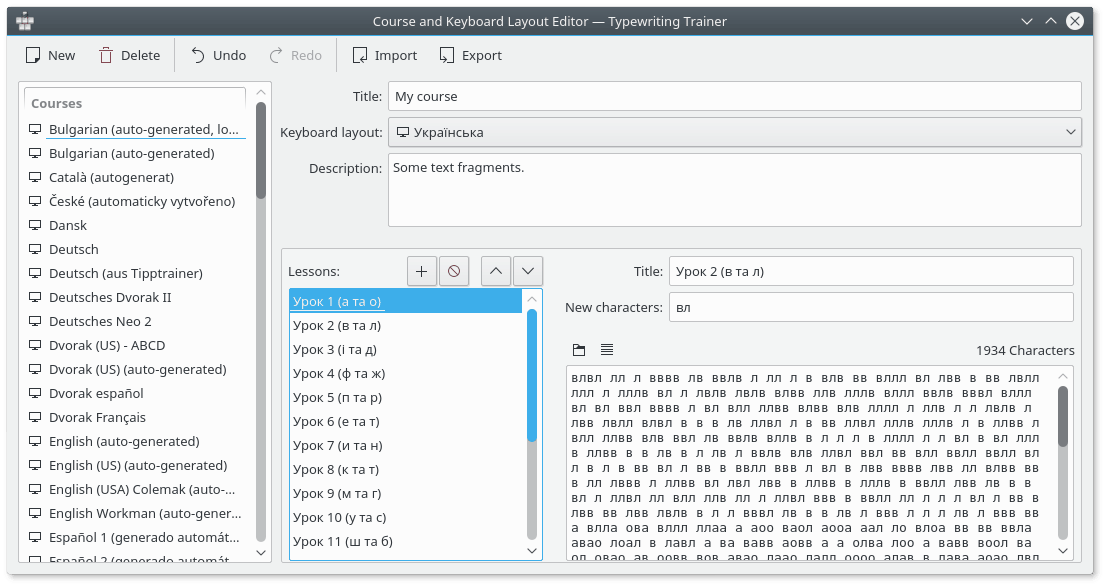
Typewriting Trainer will open the course editor window prepared to entering your course data.
A course is an ordered set of lessons. To be efficient for learning touch typing the content of the course should meet a few requirements.
- Choose a meaningful name for the lesson
For each level you can specify the new characters/keys in the lesson. It is worth to include the new characters in the lesson title. Click on a name label in the Lessons: list and enter some meaningful name.
Rationale
The text you enter as a lesson title will be shown as lesson information text in the home screen course list. It will be much easier for user to choose the lesson if it has a meaningful title.
- The first lesson should cover the home keys
Usually a keyboard has two haptic markers for the keys on the second row belonging to the index fingers. These two keys and the three adjacent keys outwards are the home keys. That's asdfjkl; for the US keyboard layout.
Rationale
Those eight keys are the start position of each finger. One must internalize the location of these keys first to successfully learn touch typing.
- Introduce two new keys per lesson
The unlocking order of keys is not fixed, but usually keys are introduced in pairs belonging to the same finger on both hands. Make your way from the home keys to the ones further away. Thus, the forth row should be introduced at last. Prefer keys for important characters of your language, this may require to bend the introduction pattern a bit. For example in French accents are really important, this warrants a lesson early-on focusing on the accent key alone.
Rationale
If more keys are introduced the trainee might get overwhelmed by the difficulty of the lesson and loose his motivation. Introduce keys for important keys first to able to form real words earlier.
- Extra emphasis on the new keys
Make sure the characters belonging to the newly introduced keys are the most or at least very frequently used characters in the lesson text.
Rationale
If the trainee passes a lesson he should have mastered the new keys. This is only possible if the lesson contains a significant amount of the new characters.
- Intersperse lessons with new keys with repetition lessons
Every two to three lessons add a repetition lesson without any new keys. These should have an even character mix covering all already introduced characters.
Rationale
Such lessons help to strengthen the acquired skills and provide a way to check the overall training level. They are also better suited for repeated training to further improve one's general typing skills.
- Dedicated lessons for capitalization
There should be several lessons focusing sorely on capitalization. Ideally capitalization is introduced in multiple steps: At first only the left Shift key, then the right, then both and followed by one or more repetition lessons.
Rationale
Mastering capitalization is the most difficult part of learning touch typing. Therefore extra effort must be spend on these lessons.
- Cover the complete keyboard layout
This includes characters and symbols accessible via other modifiers than Shift. Ideally every character, number and symbol which is printed on a real keyboard should be covered.
Rationale
The more complete a course is the more the trainee can learn from it. It also keeps the course interesting for already advanced typists.
Use ![]() button to add new lesson to
the course,
button to add new lesson to
the course, ![]() button to remove selected
lesson from your course and
button to remove selected
lesson from your course and ![]() /
/![]() buttons to rearrange the
lessons in the course.
buttons to rearrange the
lessons in the course.
Important
Delete lessons only with caution. Doing so may reset the unlocking progress of the users of the course. If you are planning to revise a course thoroughly it is usually better to use the existing course as a base for a new one.
The content of the lesson can be edited using bottom right edit field. You can copy snippets of the text from your favorite text editor and paste them to this field.
Use the ![]() button to open a generic text file
that will be loaded into the lesson text field.
button to open a generic text file
that will be loaded into the lesson text field.
The ![]() button can be used to wrap the lesson text.
Typewriting Trainer editor wraps text such that every line of the lesson does not
exceed the recommended 60 characters limit.
button can be used to wrap the lesson text.
Typewriting Trainer editor wraps text such that every line of the lesson does not
exceed the recommended 60 characters limit.
Let's assume you want to add a new lesson. There are a few guidelines you may want to consider:
- Give lessons a descriptive title
Name the new characters if there are any or otherwise state what the lesson is about.
Rationale
Good titles make it easier to find the right course if one wants to train on something specific.
- The lesson text should be composed out of real words and sentences
Optimally a lesson forms a comprehensible contiguous text on a freely chosen subject.
Rationale
Training with real words and sentences is more effective than with arbitrary random character combinations since that is closer to real typing. And it is more fun.
- Avoid non-word character combinations
This may impossible in the very first lessons where only a few characters are available, but as soon as possible only real words should be used. Never use misspelled words.
Rationale
Random character combinations are hard to type and are seldom found in day-to-day typing. Misspelled words on the other hand are confusing and have even a negative learning value, since the trainee may memorize the wrong spelling.
- Lesson text should be roughly 600 characters long
They may be longer, up to 1200 characters is okay, but shorter lessons should be avoided. This is especially true for repetition lessons.
Rationale
Keeping within this range ensures that a untrained typist (~120 characters per minute) can finish a lesson in five to ten minutes. Longer lessons get frustrating, shorter ones are ineffective.

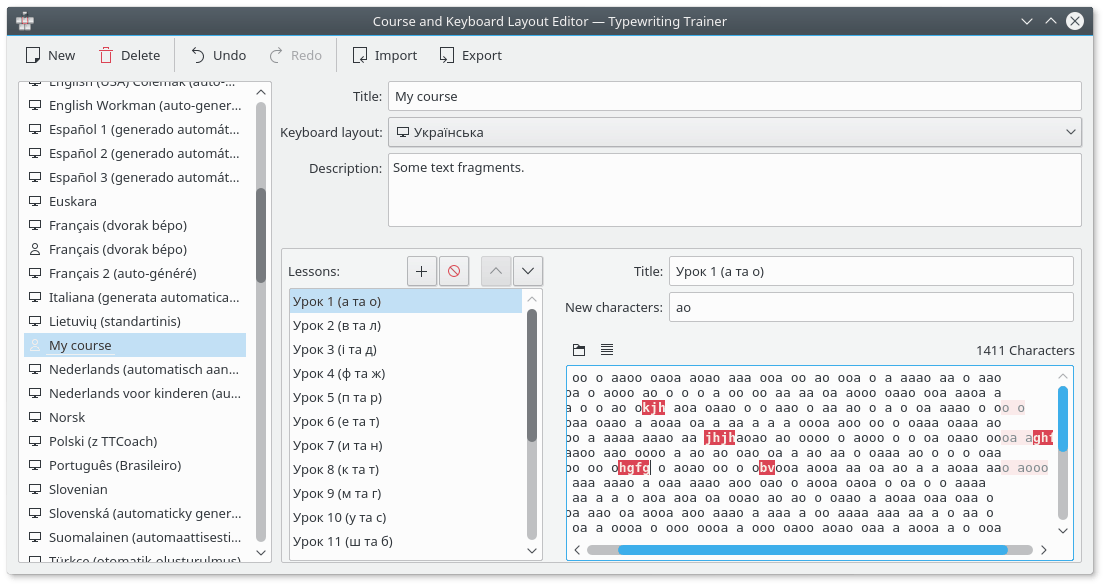
Above is a screenshot of the course editor with one of a problematic lesson loaded showing one of the built-in quality-assurance checks: if a lesson contains characters not available in that lesson, because they are not among the configured new characters of this lesson or any previous one, they are highlighted in red. There is also a check for too long lines resulting in a muted color for the characters behind the allowed column.
On the left side there is a list over all data files Typewriting Trainer knows about, built-in and user-created alike. If the user selects a built-in resource the editor will degrade to a simple viewer, though. If the user selects a keyboard layout the program will adapt appropriately.