Table of Contents
The reason for you to put all your images into KPhotoAlbum, and spending hours after hours describing them, is of course that you at some point want to look at them. For that purpose KPhotoAlbum has an viewer capable of showing your images and videos. You open the viewer from the thumbnail view as described in Chapter 4, Thumbnail viewer.
The viewer can be seen in Figure 5.1, “The Viewer”. The viewer does of course show you the image, but in addition to that it also shows you the information you specified for each image, including, who is on the images, where and when it was takes, etc.
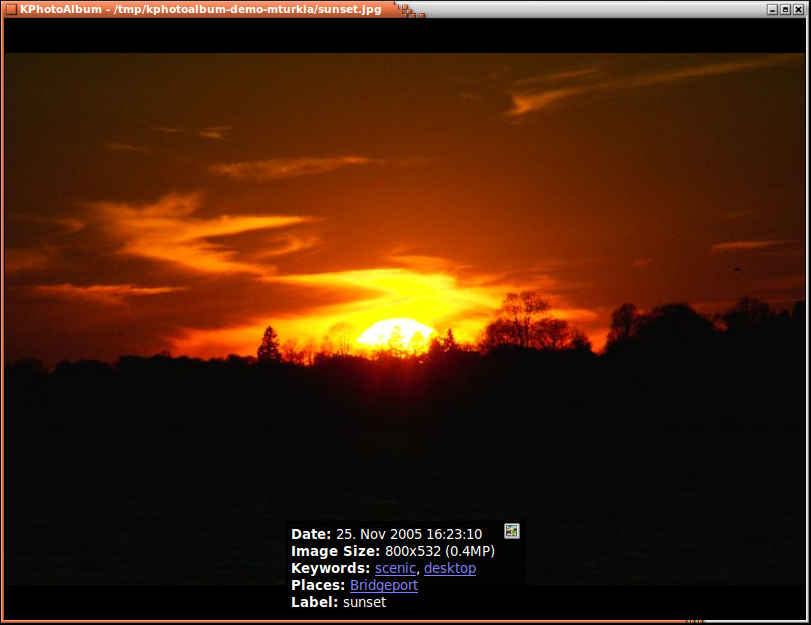
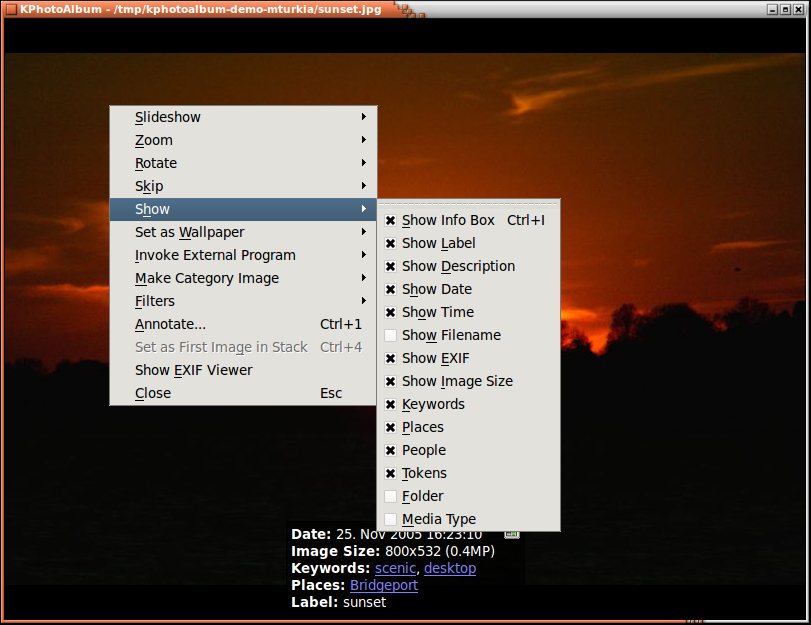
In case the info box is located on top of part of the images you actually want to see, you can simply grab it with the mouse, and move it elsewhere on the image. It is possible to configure what should be shown in the info box, and of course whether it should be shown at all. All these options are available by right clicking your mouse on the viewer. The context menu can be seen in Figure 5.2, “The viewer's context menu” below.
Some of the words in the info box is underlines. If you click the
mouse on one of these words the browser (see Chapter 3, Browsing)
will go into scope of that item. Thus if you click on Anne
Helene the browser will show you all images of Anne Helene, just
as it would have done if you selected People from the
root of the browser, and next selected Anne
Helene.
In the info box you can see a small button with the KPhotoAlbum logo. Pressing that button will get you to the thumbnail viewer. The thumbnail view will display all images, and the image you just had in the viewer will be selected. The idea behind this is the following: you browse to a given person, and look at the images of that person. One of the images is from say your high school time, and now you want to see images from that period of time. Using the Jump to Context button, you are brought to the thumbnail view showing all images, with the current one being in focus, and likely all your high school pictures around it.
In case you have loaded several images into the viewer, you can go forth and back using Page Up and Page Down. You can go to the first and last images using Home and End. These functions are of course also available from the context menu.
If several images was loaded into the viewer, you can ask it to run them as a slide show, which means that KPhotoAlbum loads a new image every few second. How often it loads a new image is configure by pressing the control key and respective plus (for go faster) or minus (go slower). Starting and stopping the slide show is done simply by pressing Ctrl+S.
A very useful feature of the KPhotoAlbum viewer is it ability to go into full screen mode. In this mode, the viewer is using the complete screen space, simply press the return key to make it go into and out of full screen mode.
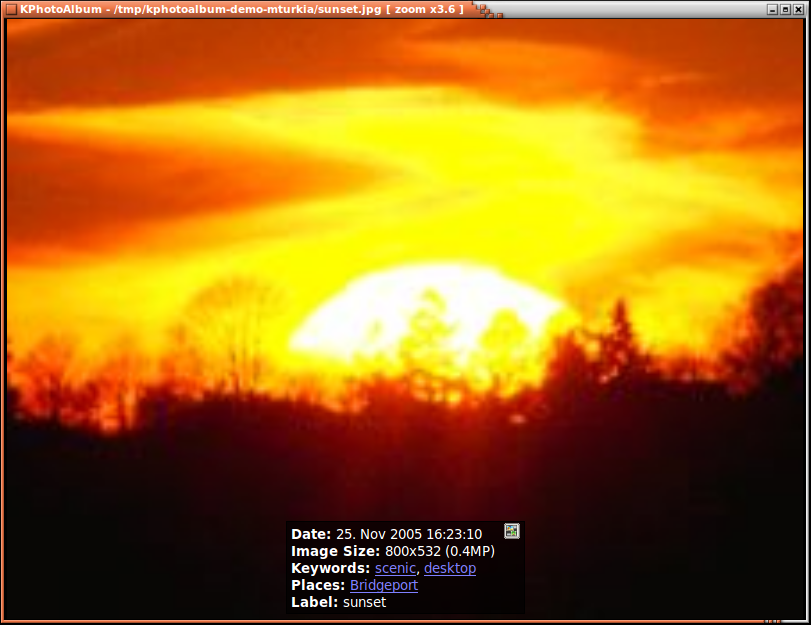
Using the viewer, you may zoom in and out of your image, simply by dragging out a rectangle with the mouse. Pressing the minus key will zoom out again. Pressing the plus key will zoom in at the center of the image. Figure 5.3, “Zooming in the viewer” below shows how a zoom rectangle is marked, and Figure 5.4, “Zooming in the viewer” shows the result of the zoom.
Pressing the period key, lets you reset zooming, so the image is shown un-zoomed. Pressing the equal sign will set the zoom level so each pixel on the screen correspond to a pixel in the image.
Notice, for technical the only zooming operation that works when watching videos are zoom in and out (the plus and minus key).

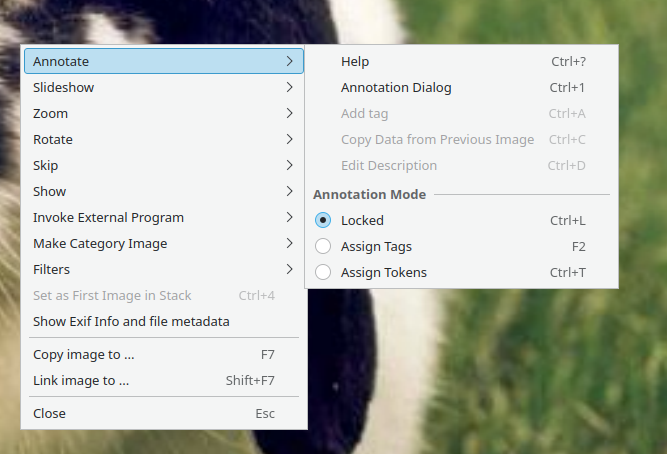
Choosing the rotate operations from the context menu, you may rotate the image (Does not work for videos). You can annotate the current image, simply by choosing in the context menu.
Traditionally the main way for tagging images has been though the annotation dialog. Over the years a few different attempts have been made at integrating tagging into the viewer, first attempt was by assigning tokens in the viewer, a later attempt was by making it possible to tag directly by typing part of a category item. In addition category items could be assigned to function keys on the keyboard. The code for all of this have now been modernized to make the work flow much more intuitive and discover-able.
There are three modes to annotating images in the viewer:
Locked - This is the default mode when starting the viewer - in here no annotating or tokenizing will happen. This ensure you do not accidentally annotates images when viewing them.
Assign Tokens - This allows you to set tokens on images, by simply pressing a key from A-Z on the keyboard.
Assign Tags - This allows you to assign macros to a keyboard key. As an example, L could mean set the item Las Vegas in the Location category. In addition to that, it also allows you to set any tag on an image.
The modes are selected from the context menu as can be seen in Figure 5.5, “Selecting annotation mode from the viewer”.
The two modes are described in details below.